Running your containerized application on the Microsoft Azure cloud platform
 Trung Tran
In this post, I will demonstrate one option to run containerized .NET Core application on one of the most popular cloud provider on earth (Microsoft Azure). We will create a simple .NET application, containerize it and then run it on the cloud.
Prerequisites:
- Microsoft Azure account with an active subscription.
- GitHub account.
- Visual Studio to create .NET application.
- Docker Desktop up & run locally.
- Basic knowledge of Docker & Azure.
1. Create our ASP.NET web application and run it locally.
First, create a new ASP.NET Core web application using Visual Studio as below steps:
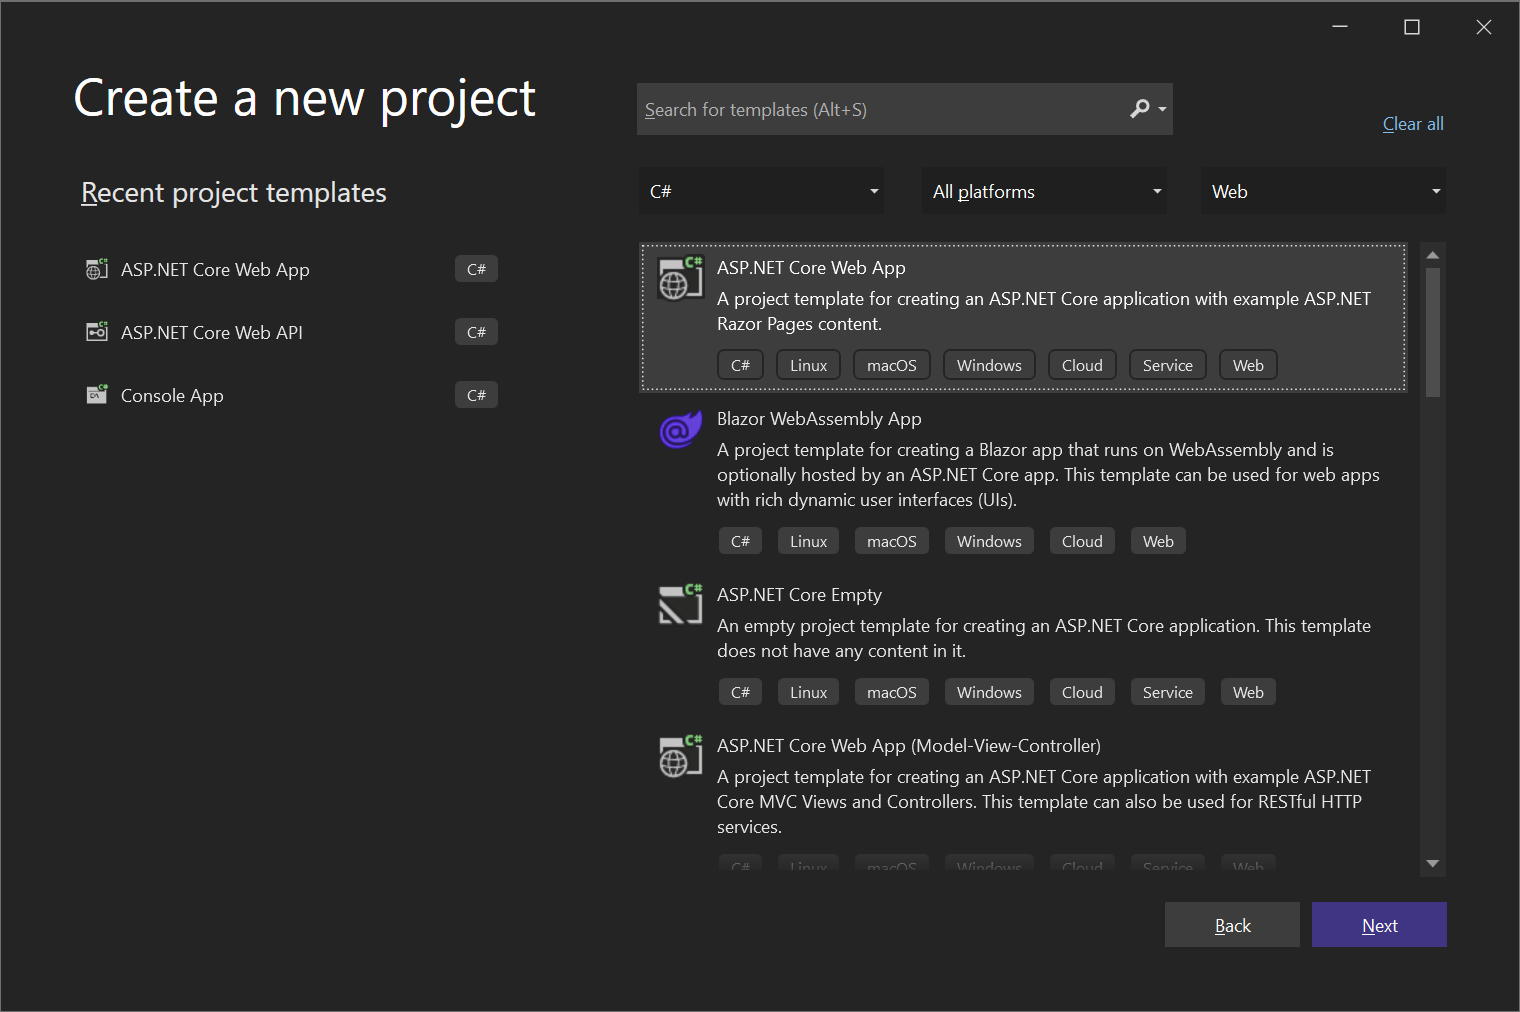
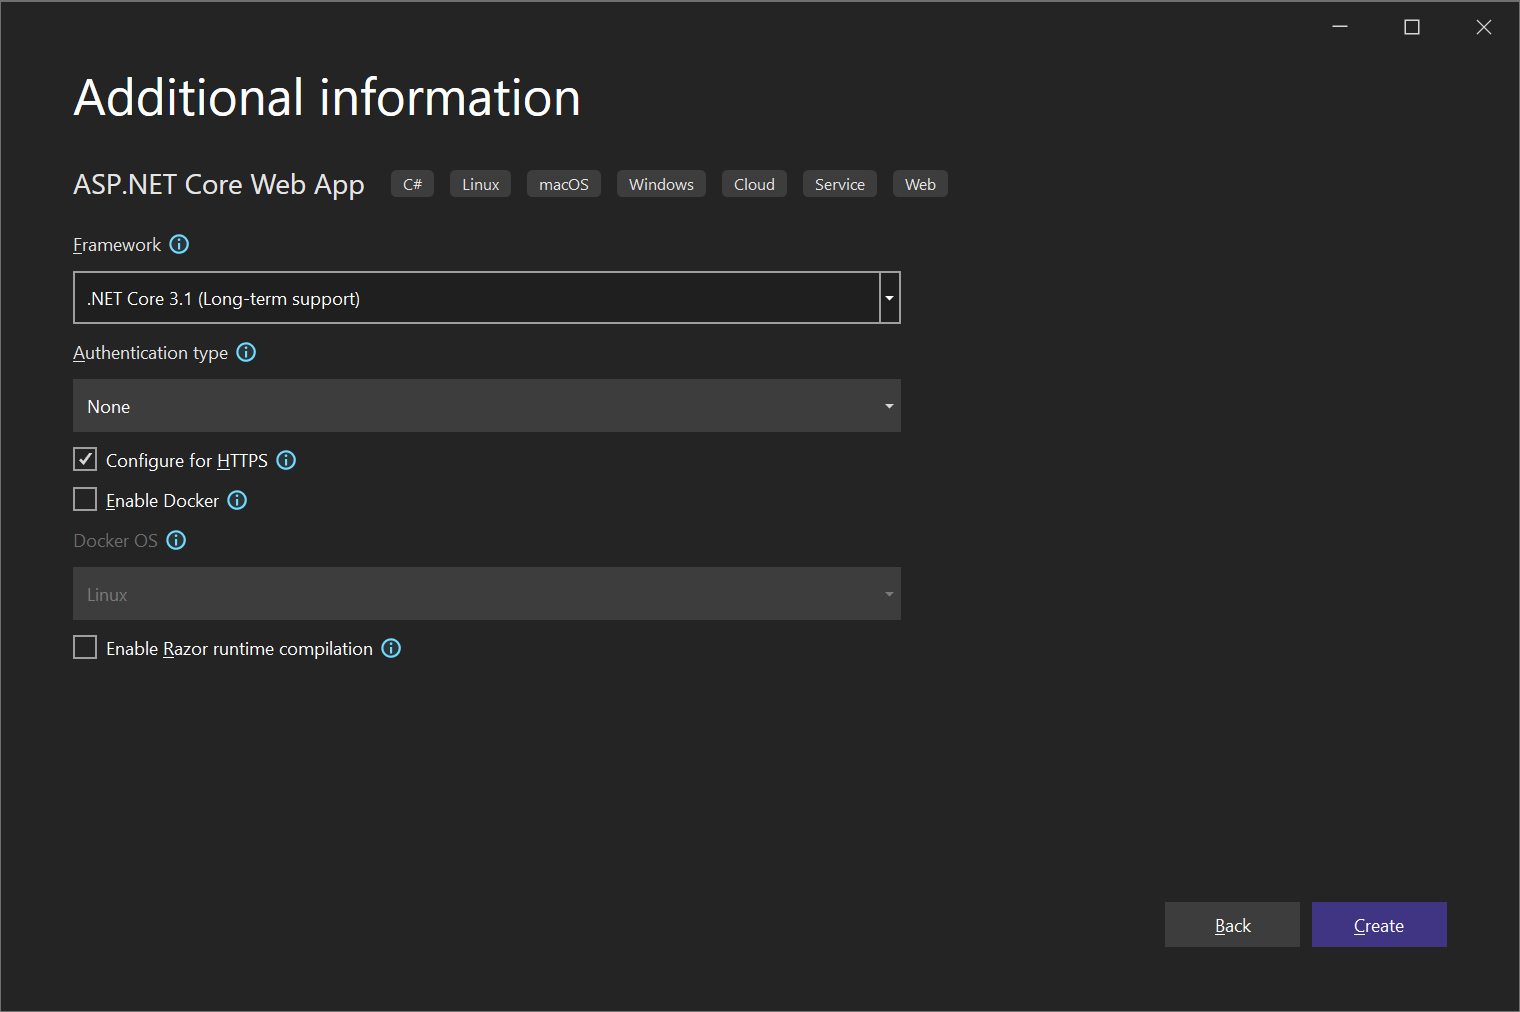
Use .NET Core 3.1 LTS framework and leave Enable Docker unchecked (we will write Dockerfile manually to learn). After the project is successfully created, run it locally (Ctrl + F5) and verify it.
2. Containerize ASP.NET web app with Docker
In this step, we will create a Dockerfile so that our application can run as a container (actually, we can just check Enable Docker in the project creation steps, but I want to write it manually so we can have a better understanding).
Create a Dockerfile in the project directory like below:
FROM mcr.microsoft.com/dotnet/aspnet:3.1 AS base
WORKDIR /app
EXPOSE 80

FROM mcr.microsoft.com/dotnet/sdk:3.1 AS build
WORKDIR /src
COPY ["MyDemoWebApp/MyDemoWebApp.csproj", "MyDemoWebApp/"]
RUN dotnet restore "MyDemoWebApp/MyDemoWebApp.csproj"
COPY . .
WORKDIR "/src/MyDemoWebApp"
RUN dotnet build "MyDemoWebApp.csproj" -c Release -o /app/build

FROM build AS publish
RUN dotnet publish "MyDemoWebApp.csproj" -c Release -o /app/publish

FROM base AS final
WORKDIR /app
COPY --from=publish /app/publish .
ENTRYPOINT ["dotnet", "MyDemoWebApp.dll"]
Base image: mcr.microsoft.com/dotnet/aspnet:3.1, listening on port 80.
Navigate to solution folder and run docker build command to build docker image from Dockerfile (noted that I run the command from the parent folder, not where the Dockerfile located, that why I need to have -f flag).
$ docker build -f MyDemoWebApp/Dockerfile -t mydemowebapp .
Next, run the container using docker container run command and map port 8080 on the host to port 80 of the container.
$ docker run -dt --name my-demo-web-app -p 8080:80 mydemowebapp

$ docker ps
CONTAINER ID   IMAGE          COMMAND                  CREATED         STATUS         PORTS                  NAMES
dab93a9b1fcb   mydemowebapp   "dotnet MyDemoWebApp"   9 minutes ago   Up 9 minutes   0.0.0.0:8080->80/tcp   my-demo-web-app
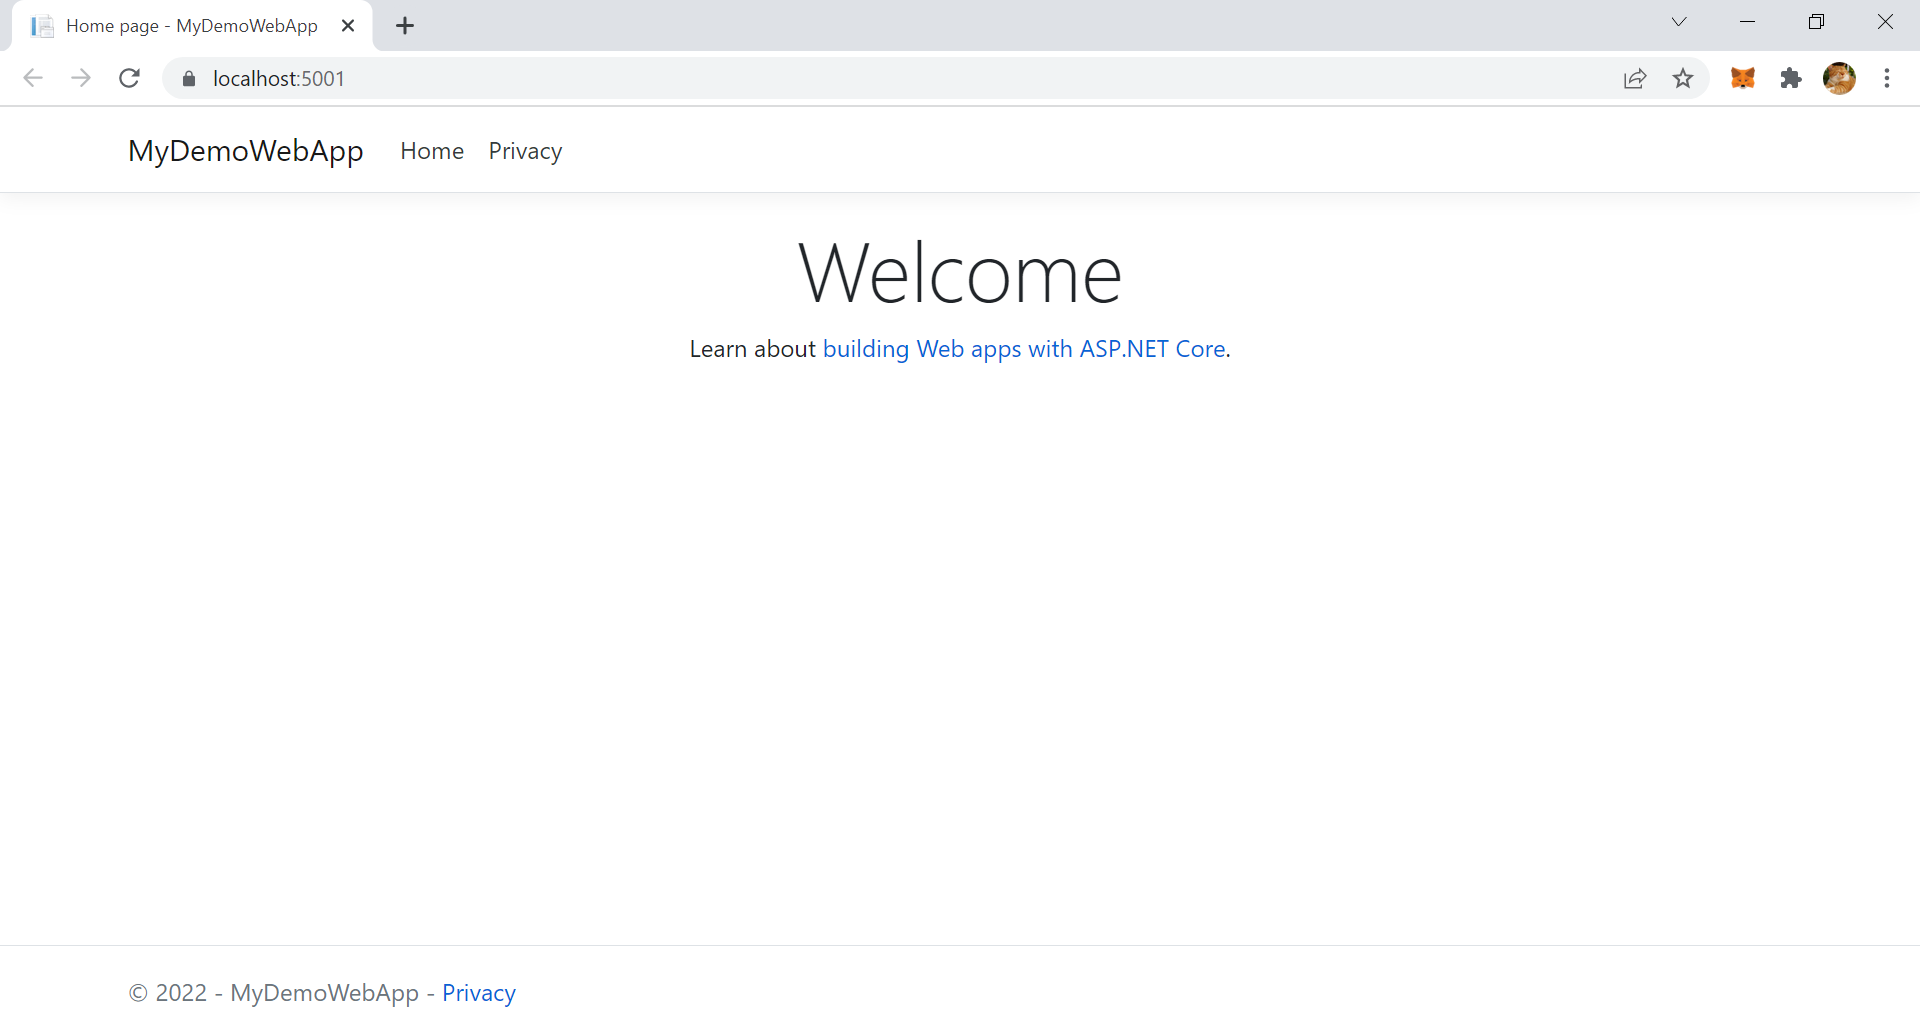
Verify the container by accessing http://localhost:8080/, it should show the Welcome page as above image.
3. Tag docker image and push to docker hub repository
To make the demo simple, we will use Docker Hub as our repository, in real-world projects, the private repository option will be used instead (Azure Container Registries, Amazon ECR...).
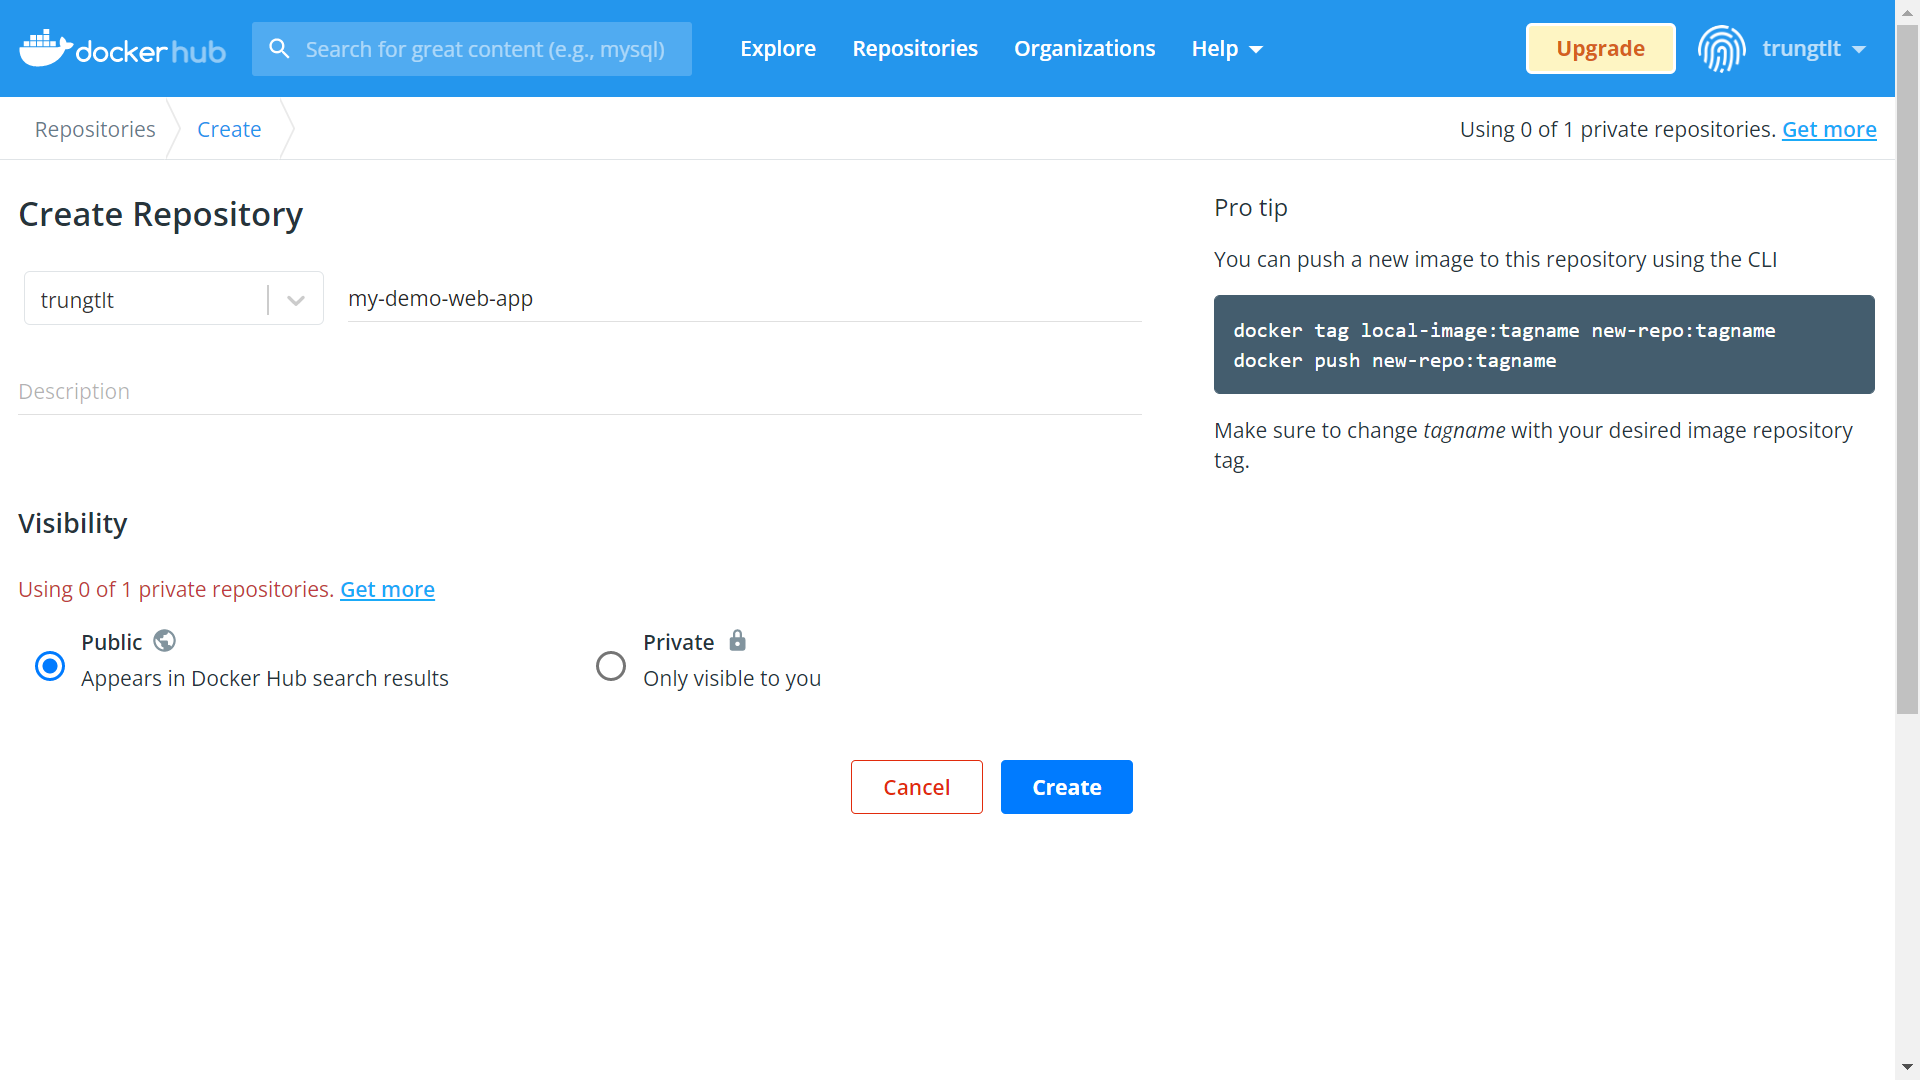
Open Docker hub and create a public repository for our demo app:
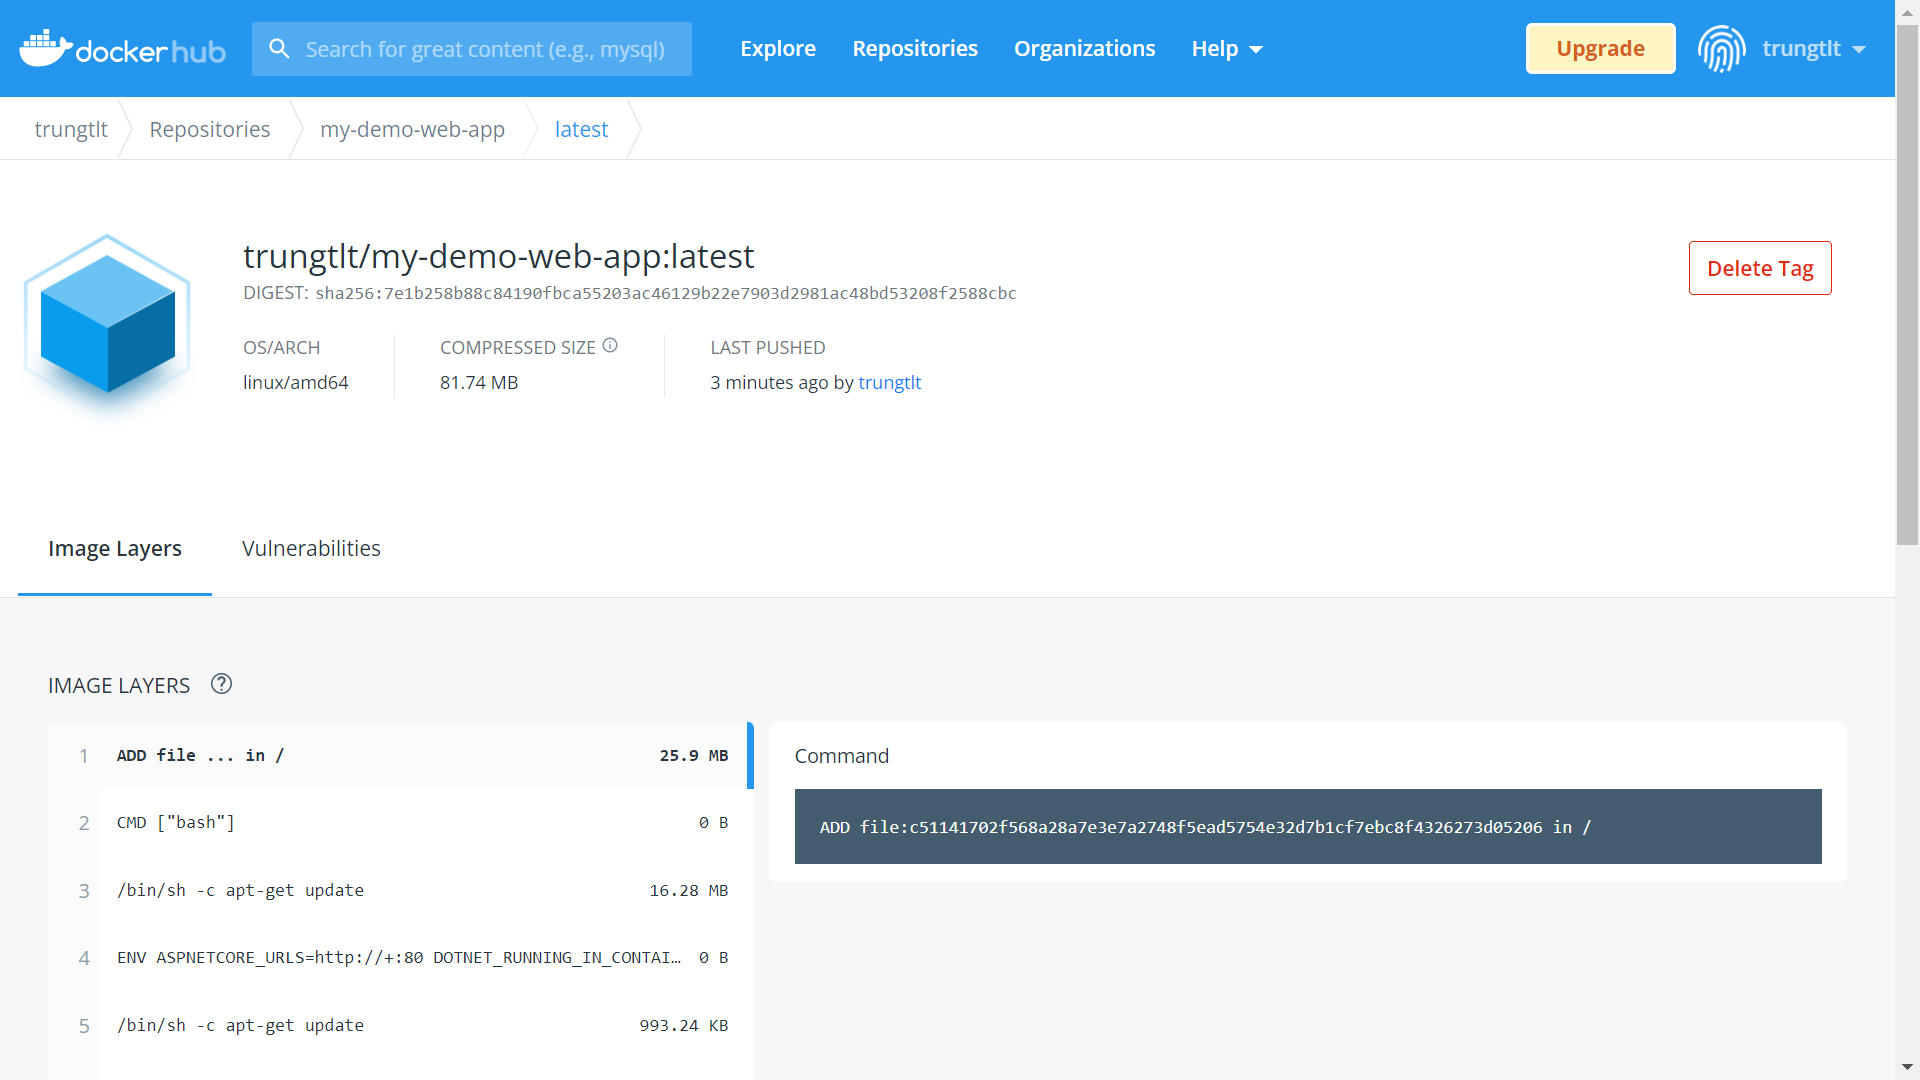
$ docker tag mydemowebapp:latest trungtlt/my-demo-web-app:latest

$ docker push trungtlt/my-demo-web-app:latest
The push refers to repository [docker.io/trungtlt/my-demo-web-app]
d0179e95459b: Preparing
5f70bf18a086: Preparing
8343c61fec2c: Preparing
4d26b9c21cee: Preparing
11280ad13be6: Preparing
2ad0addaac90: Preparing
068c0c45d9f4: Preparing
f18b02b14138: Preparing
2ad0addaac90: Waiting
068c0c45d9f4: Waiting
f18b02b14138: Waiting
5f70bf18a086: Layer already exists
4d26b9c21cee: Layer already exists
d0179e95459b: Layer already exists
8343c61fec2c: Layer already exists
f18b02b14138: Layer already exists
2ad0addaac90: Layer already exists
068c0c45d9f4: Layer already exists
11280ad13be6: Pushed
latest: digest: sha256:7e1b258b88c84190fbca55203ac46129b22e7903d2981ac48bd53208f2588cbc size: 1999
4. Provision compute resource on Microsoft Azure (Azure Container Instance)
Azure Container Instance is a compute service on Azure that allows us to run containers without managing servers (container as a service - CAAS), more about ACI can be found here: https://docs.microsoft.com/en-us/azure/container-instances/container-instances-overview.
Open Azure portal at https://portal.azure.com/ and navigate to Container instances service (search "Container instances").
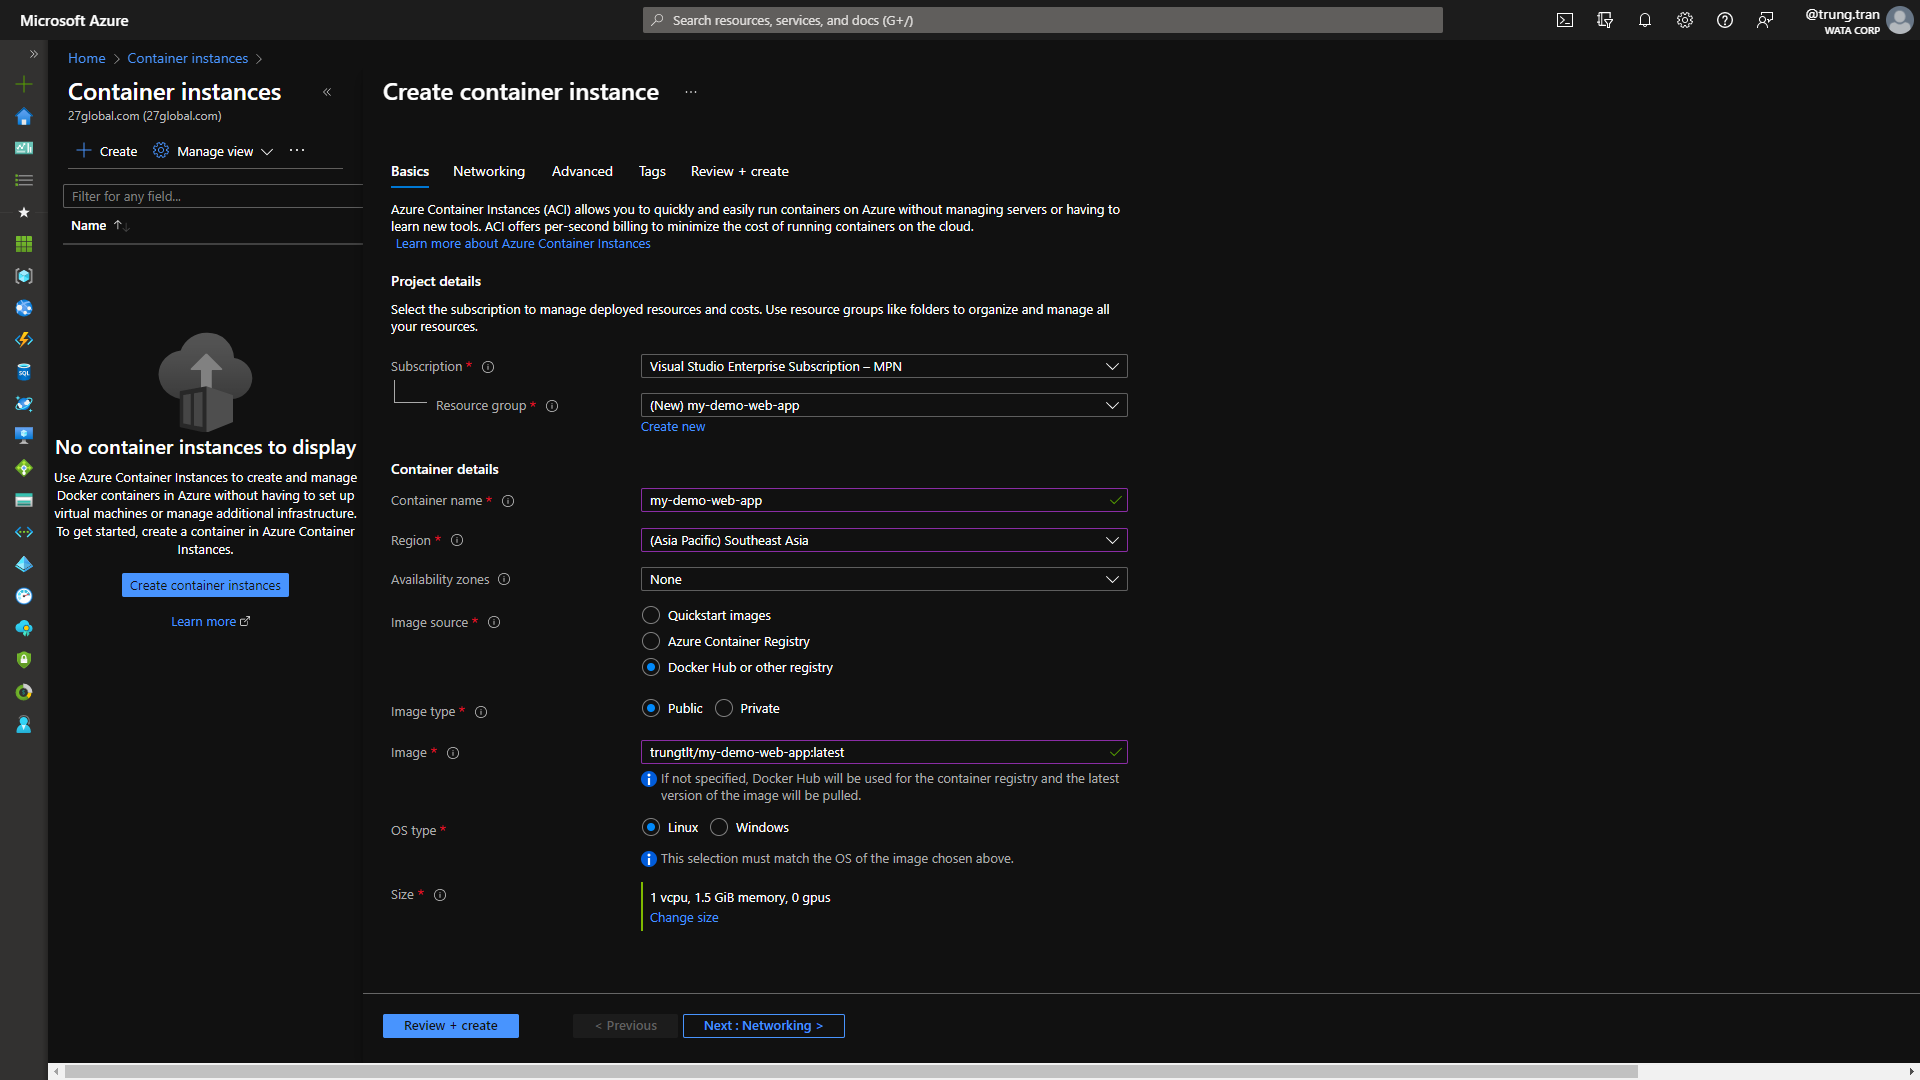
Subscription: select your own subscription, resource group: create new, container name: my-demo-web-app, Region: Southeast Asia, Image source: Docker Hub or other registries, Image type: Public, Image: {image URL}, OS type: Linux.
Go to the Networking tab and configure as below image:
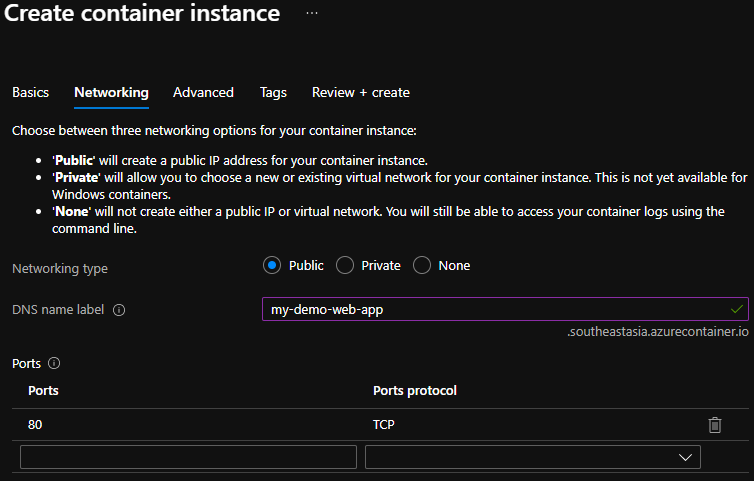
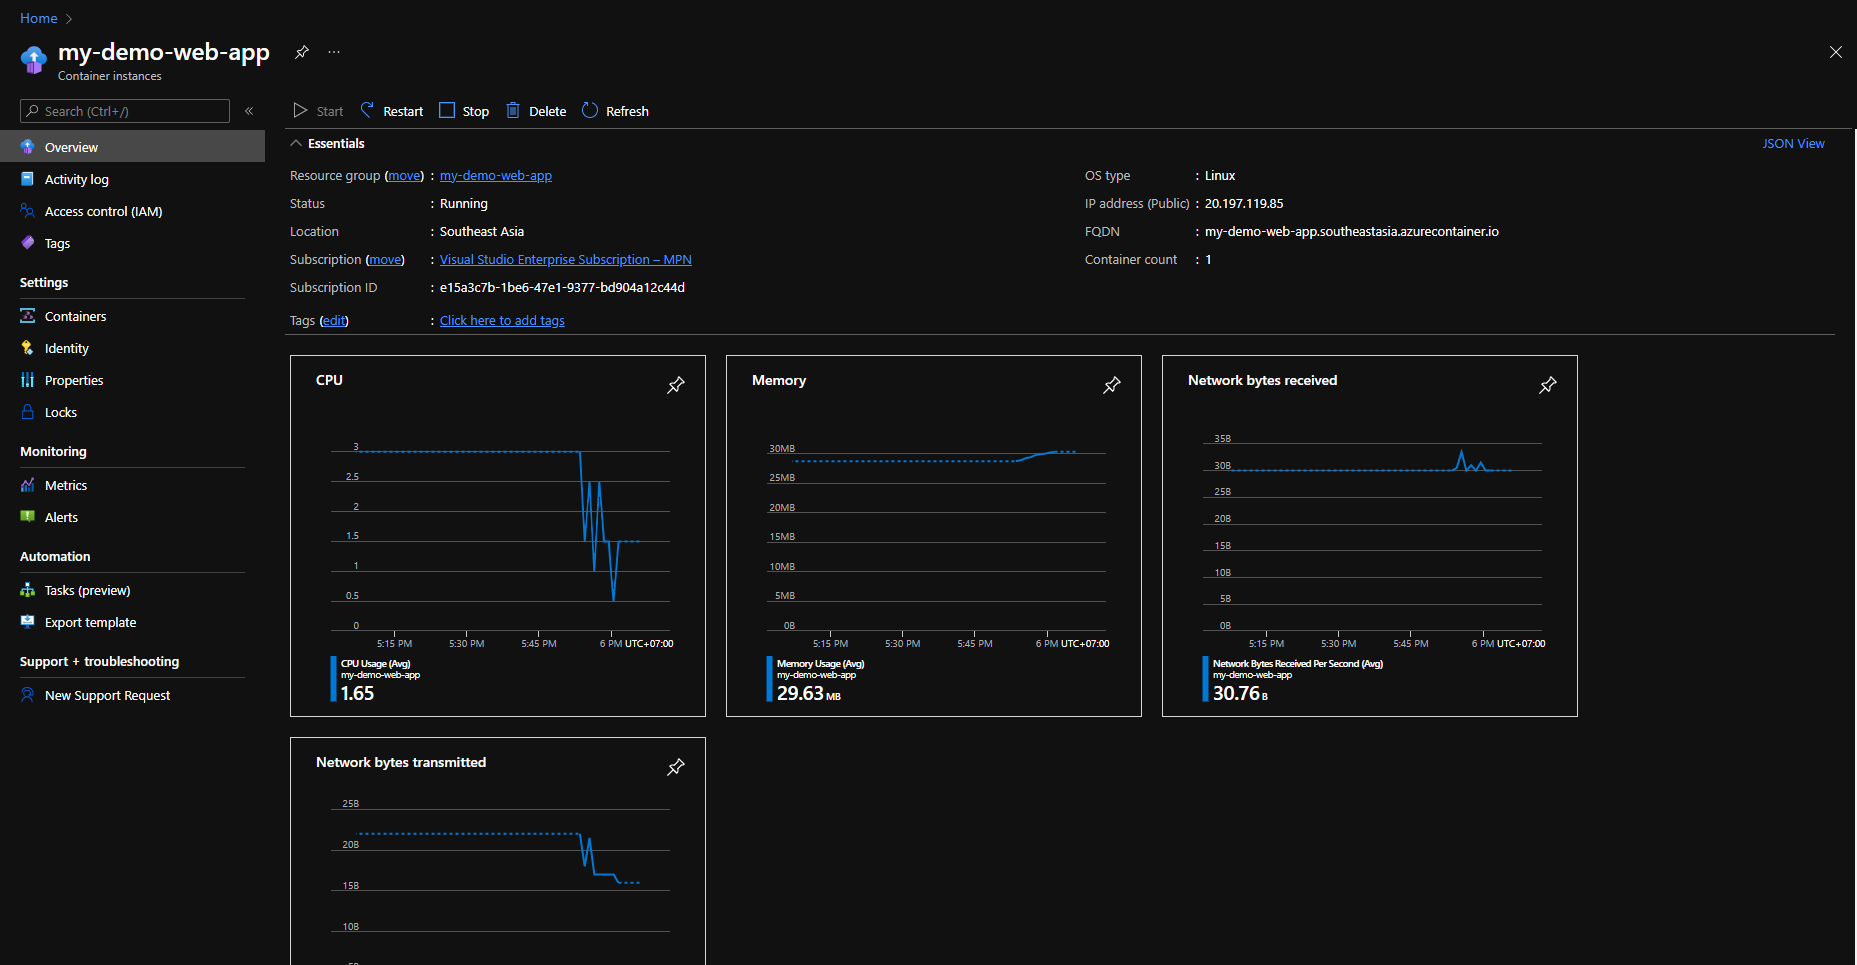
We just reached the final step to run our containerized application on Azure, we can verify it by accessing container instance FQDN, it will be {name}.southeastasia.azurecontainer.io.
Congrats, we successfully create the asp.net application, dockerize it, publish it to the Docker Hub repository and then run it on Azure cloud. Hope you enjoy this journey and see you in the next posts.