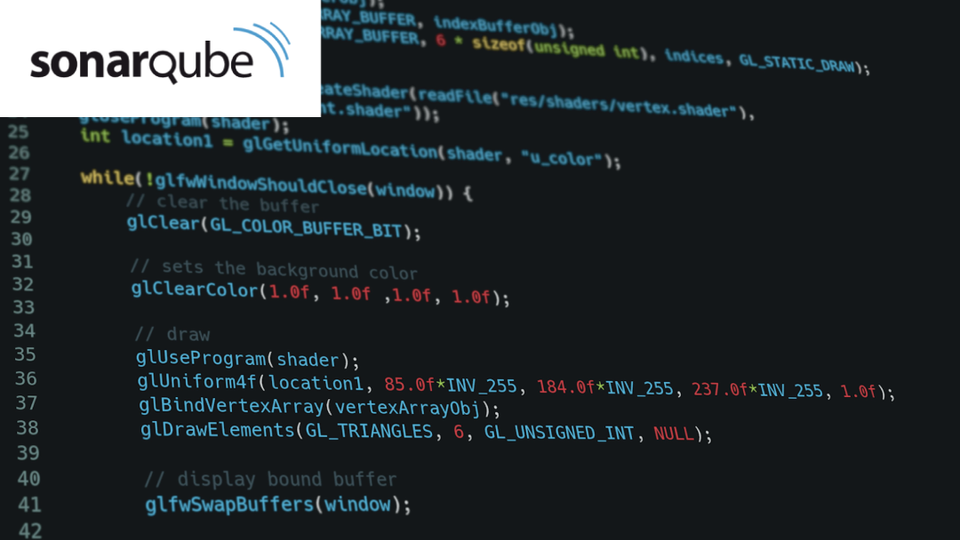
Continuous inspection of code quality with SonarQube tool
In this post, we will create a Linux VM on the GCP with Compute Engine service and use it as our SonarQube server. Then we will configure SonarQube to scan our repository on GitHub using the GitHub app & GitHub Actions.
Pre-requisites
- A Google Cloud Platform account
- Basic knowledge of GCP Compute Engine
- Basic knowledge of Docker
- A GitHub account and sample code repository
1. What is SonarQube and how it can help to improve your code quality?
SonarQube is an open-source code inspection tool that continuously monitors our codes and helps us write clearer & better codes.
It supports a wide range of programming languages and frameworks, defining a set of static code analysis rules, allowing developers to detect the code issues before releasing them.
2. Create a Linux VM on Google Cloud & install Docker
First, open the Google Cloud console and navigate to the Compute Engine dashboard, then click Create Instance to create a new VM.
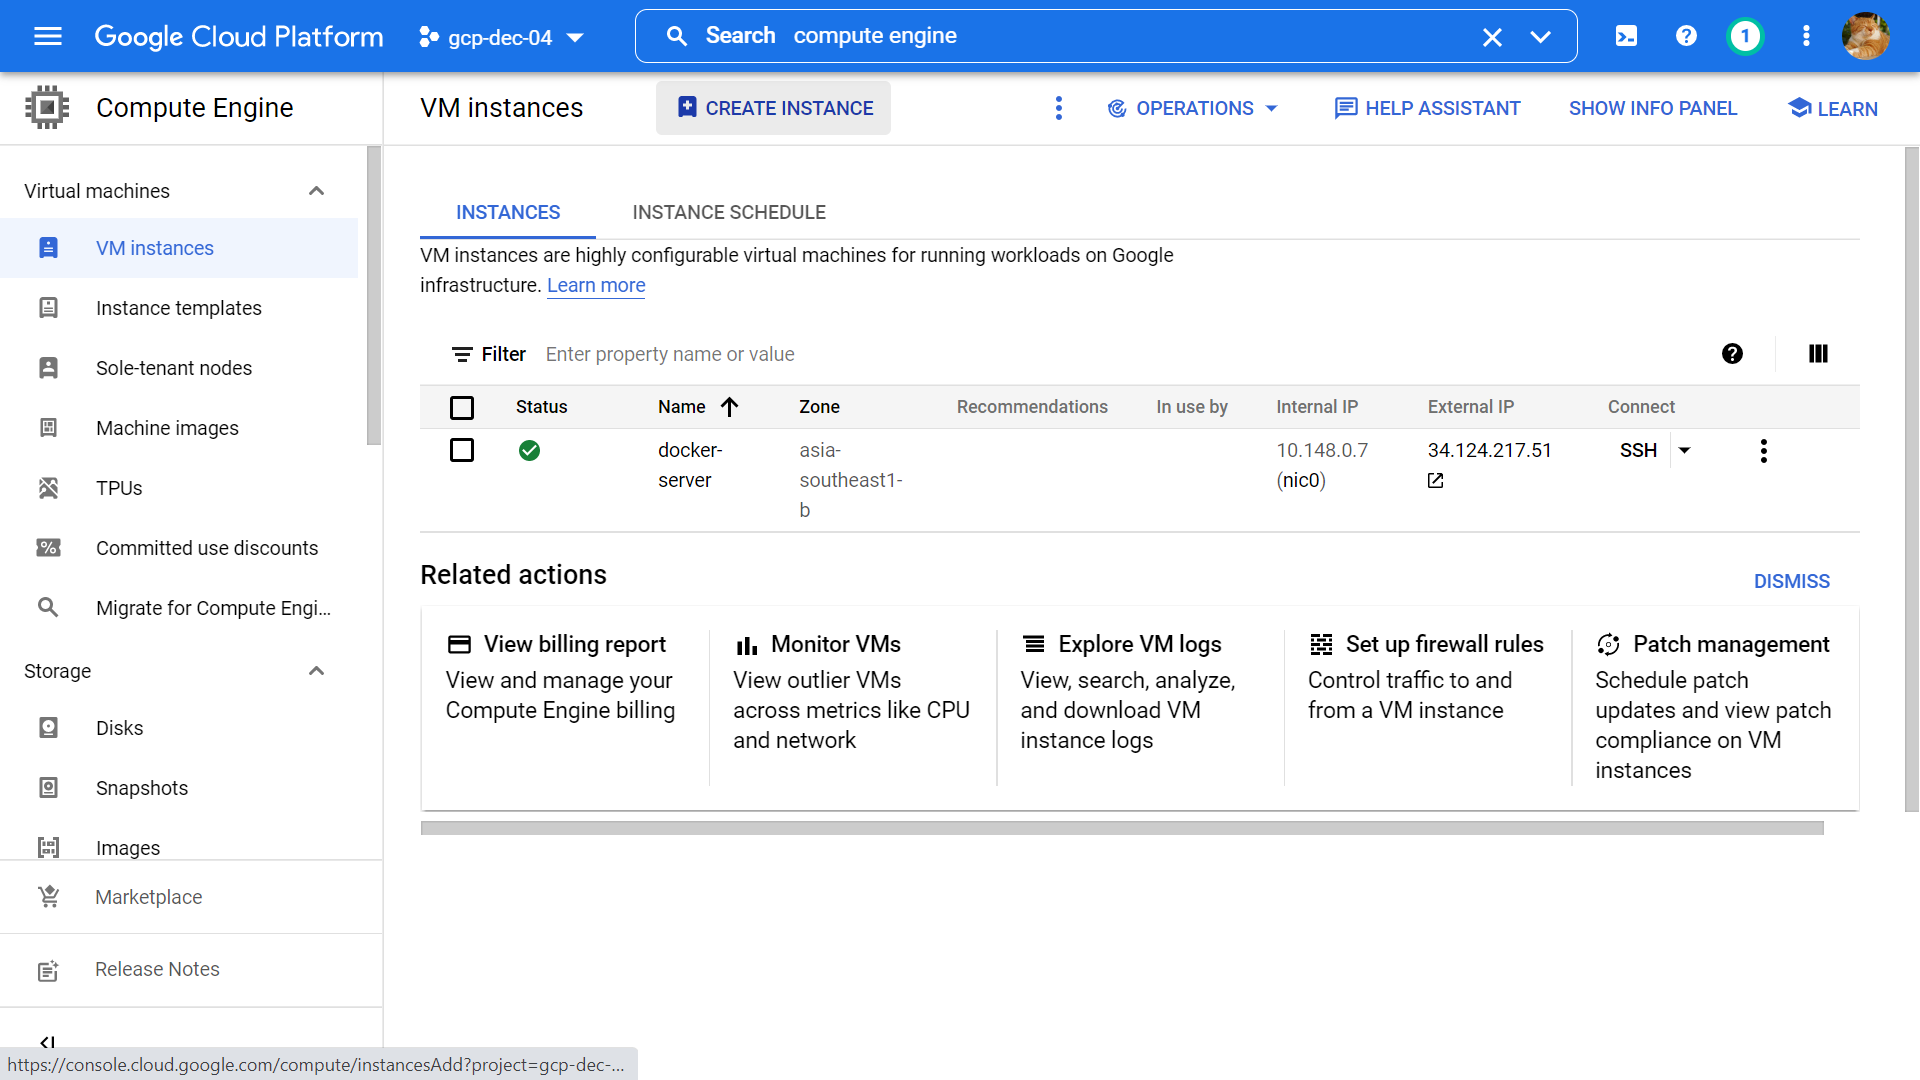

Name: my-docker-server, Region (the closest region to your location): asia-southeast-1, Machine family: E2, Machine type: e2-medium.
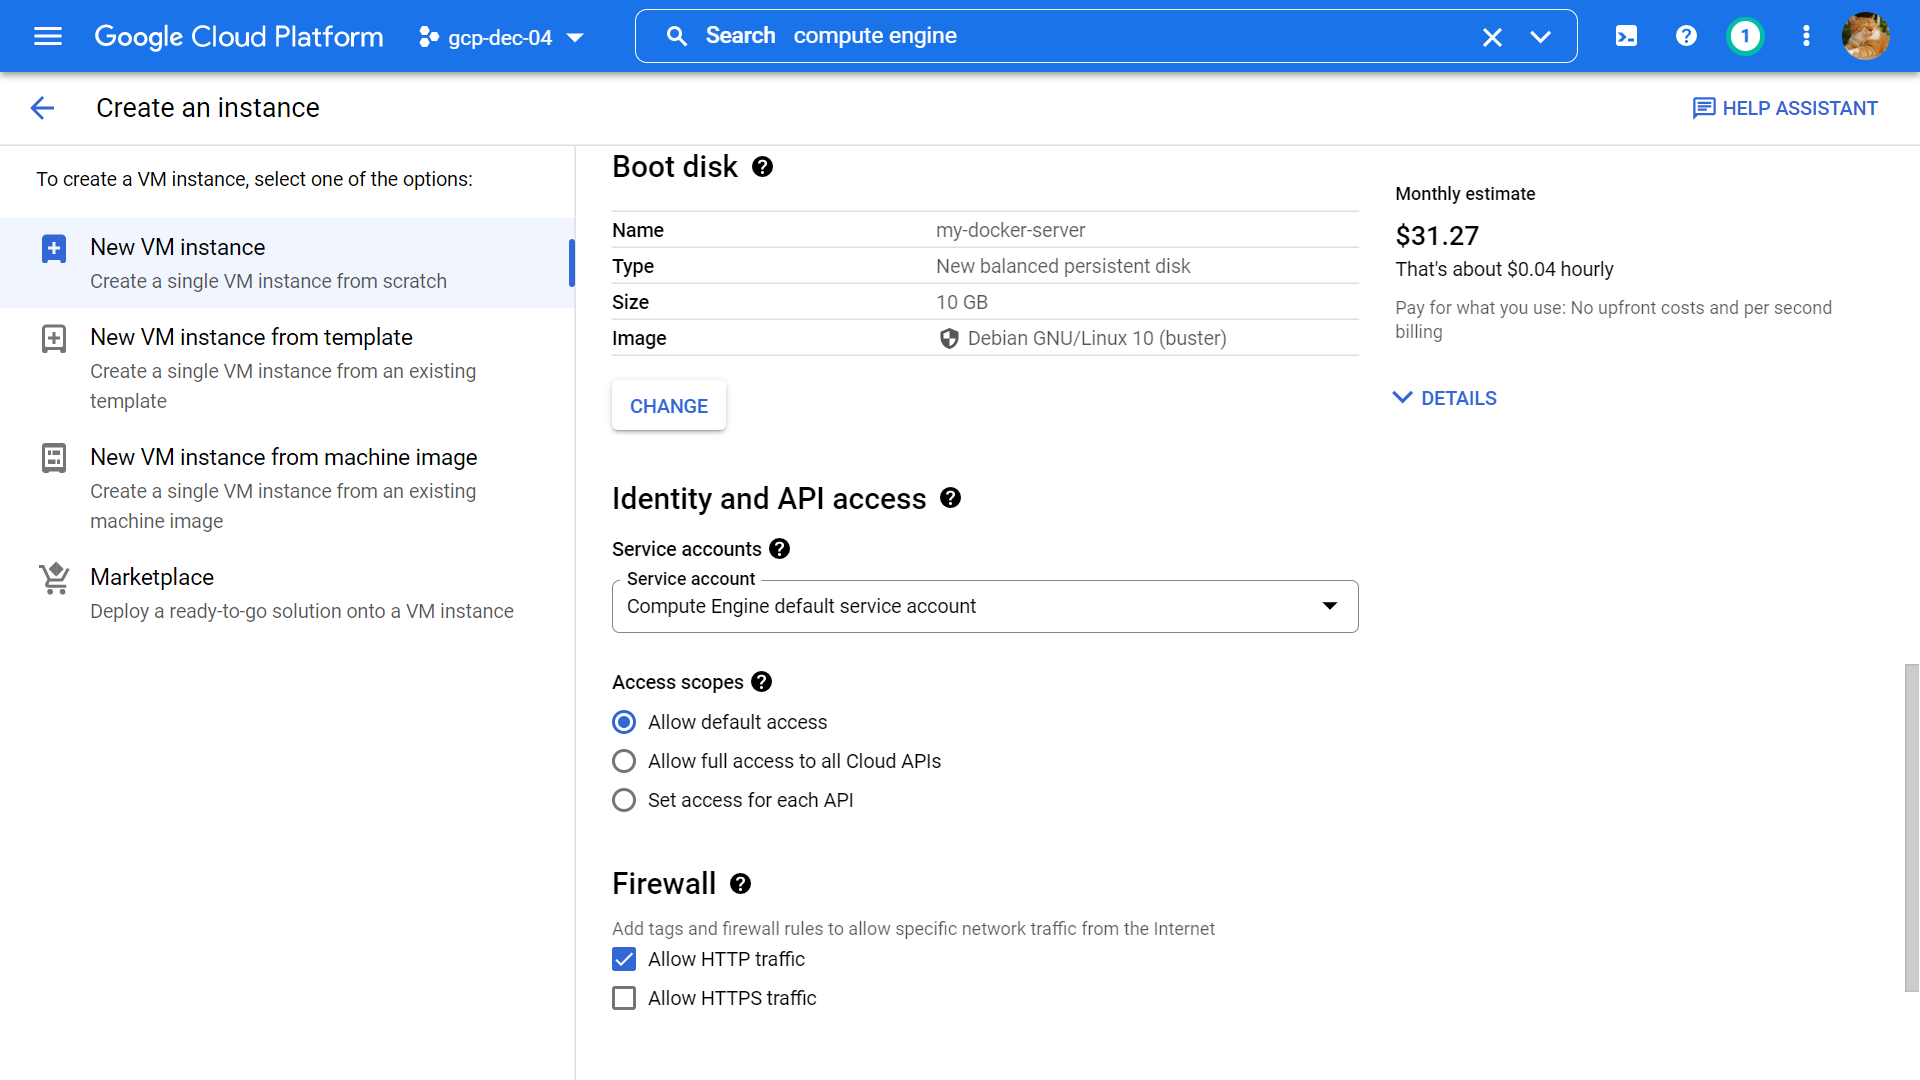
Boot disk image: Debian GNU/Linux 10 (buster), Firewall: Allow HTTP traffic, keep other options as default value then click Create.
After successfully creating the VM, SSH to it from the console by clicking the SSH button, we will install Docker on this VM follow this official guides from Docker: https://docs.docker.com/engine/install/debian/
sudo du

apt-get update

apt-get install \
    ca-certificates \
    curl \
    gnupg \
    lsb-release

curl -fsSL https://download.docker.com/linux/debian/gpg | sudo gpg --dearmor -o /usr/share/keyrings/docker-archive-keyring.gpg

echo \
  "deb [arch=$(dpkg --print-architecture) signed-by=/usr/share/keyrings/docker-archive-keyring.gpg] https://download.docker.com/linux/debian \
  $(lsb_release -cs) stable" | sudo tee /etc/apt/sources.list.d/docker.list > /dev/null

apt-get install docker-ce docker-ce-cli containerd.io

Verify the installation by running this command:
docker run hello-world
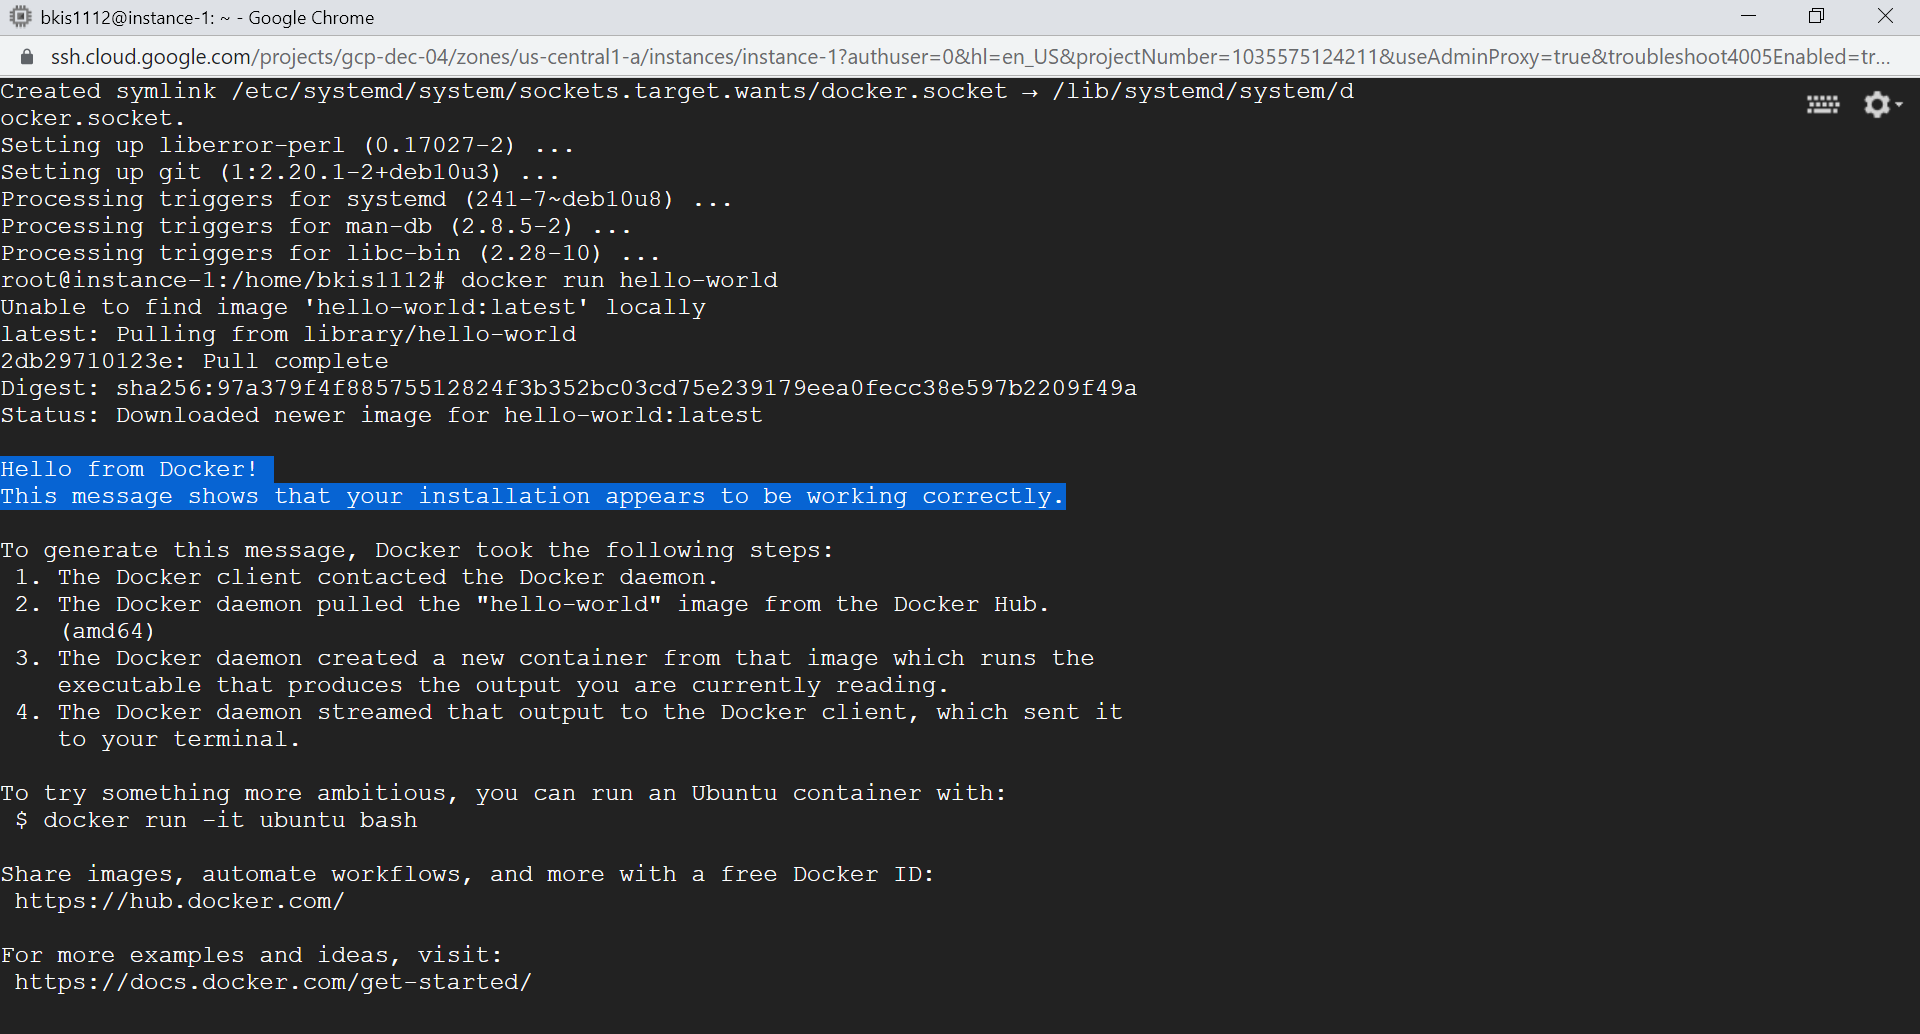
In this step, we create a new Debian VM using GCP Compute Engine, SSH to it, and install Docker, let move to the next steps.
3. Run SonarQube on Debian VM using its official Docker image
First, let's start by pulling the SonarQube docker image using the docker pull command (make sure you already SSH to the my-docker-server VM)
docker pull sonarqube
Then run the image using docker container run command and mapping port 80 to the container.
docker container run -dt --name sonarqube -p 80:9000 sonarqube
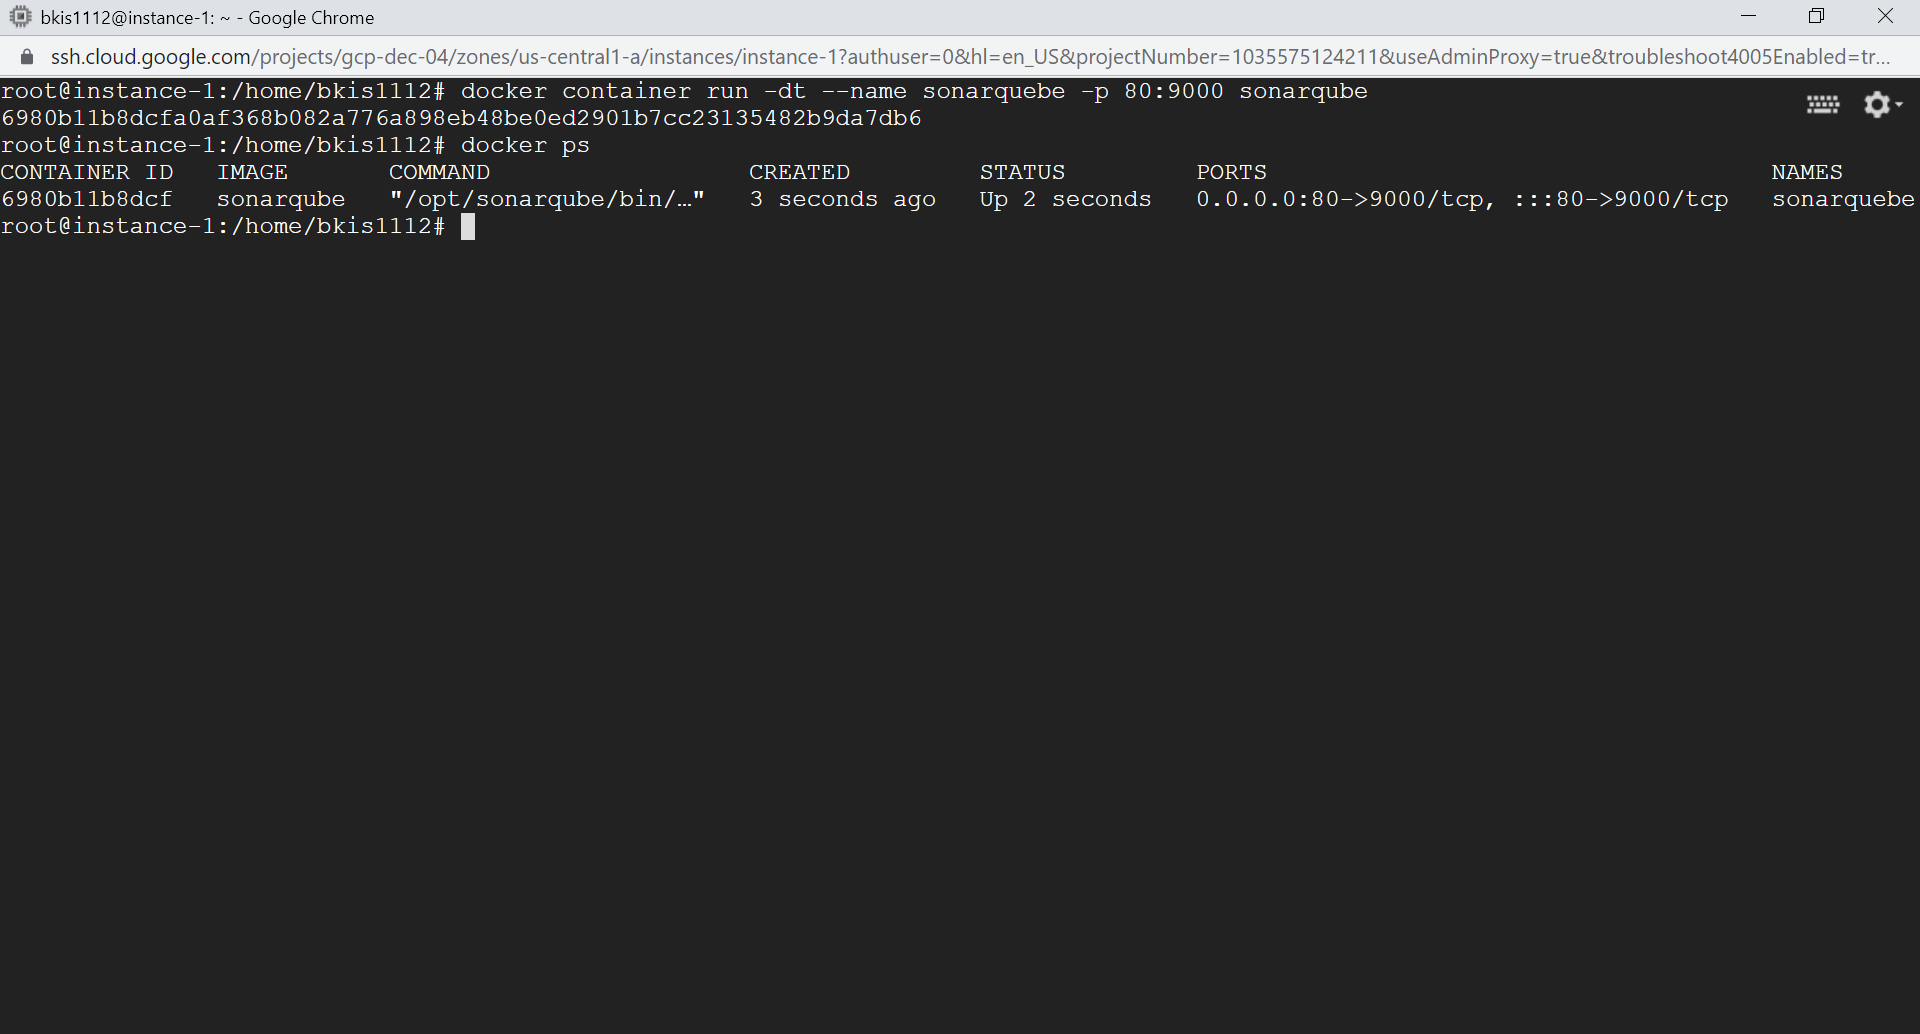
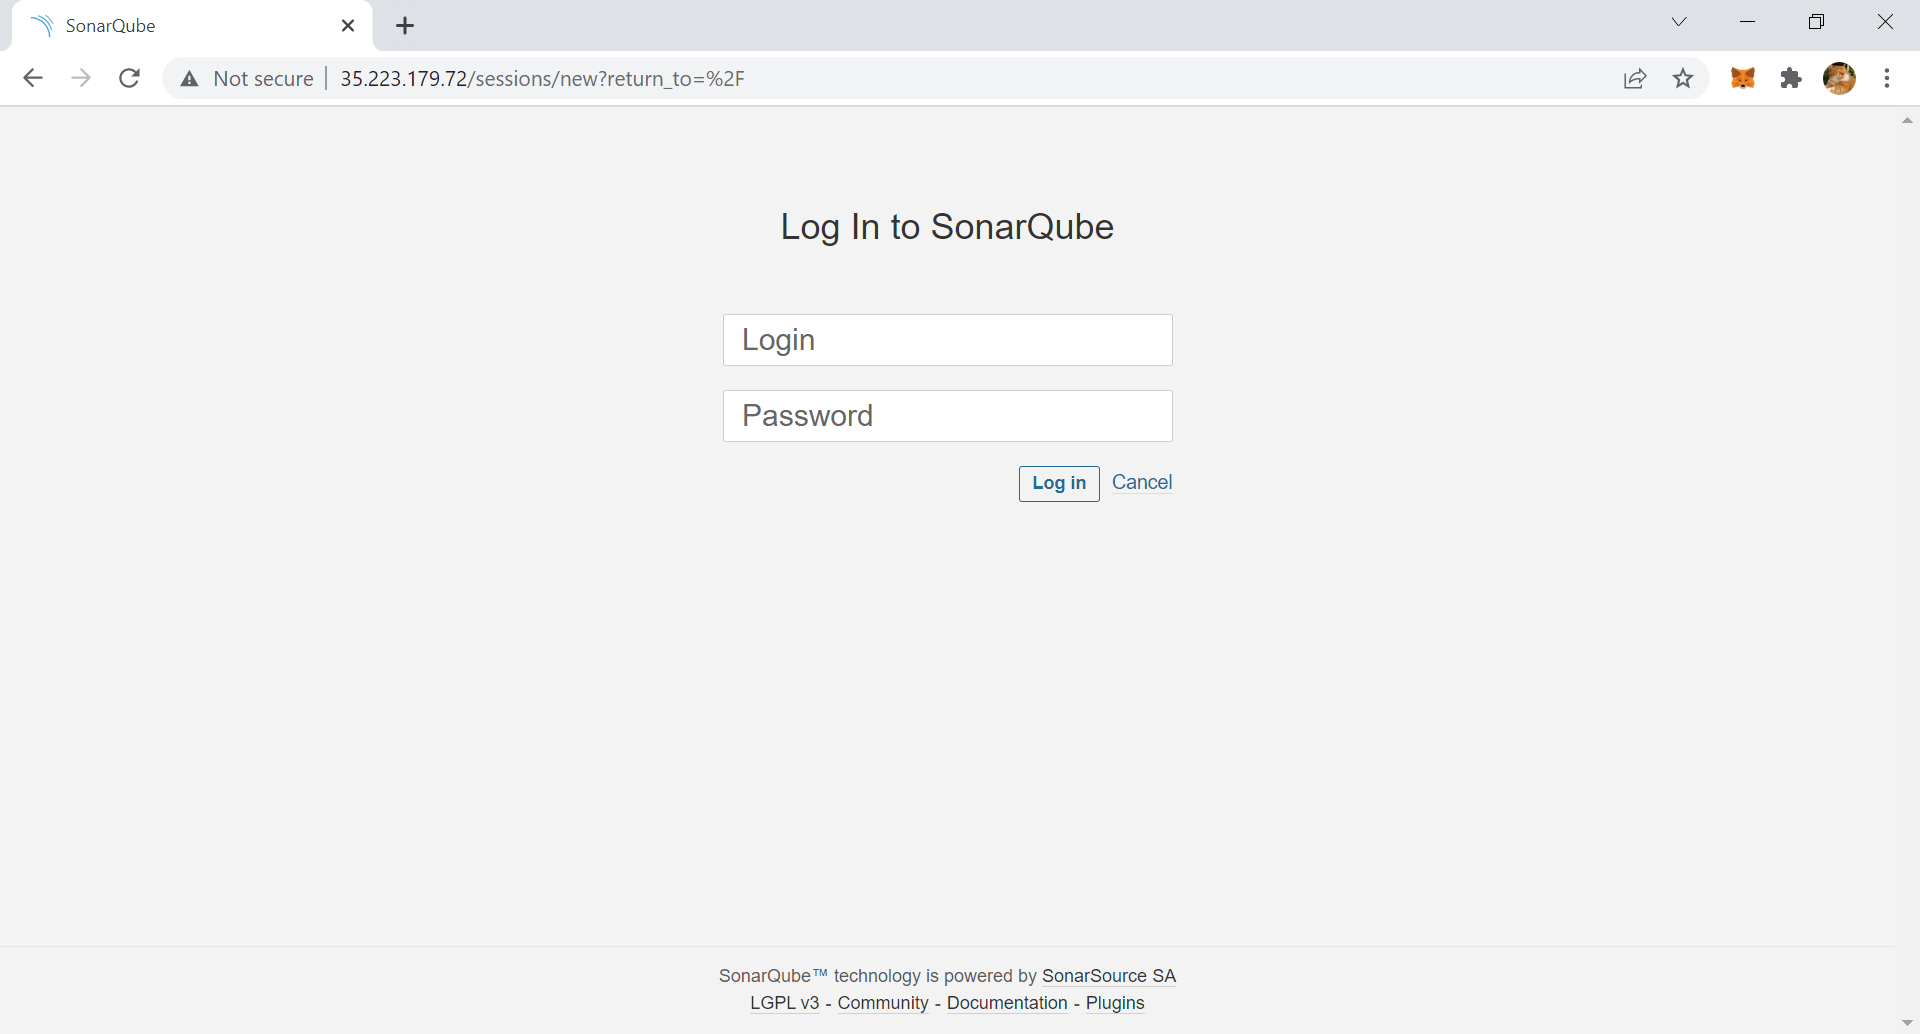
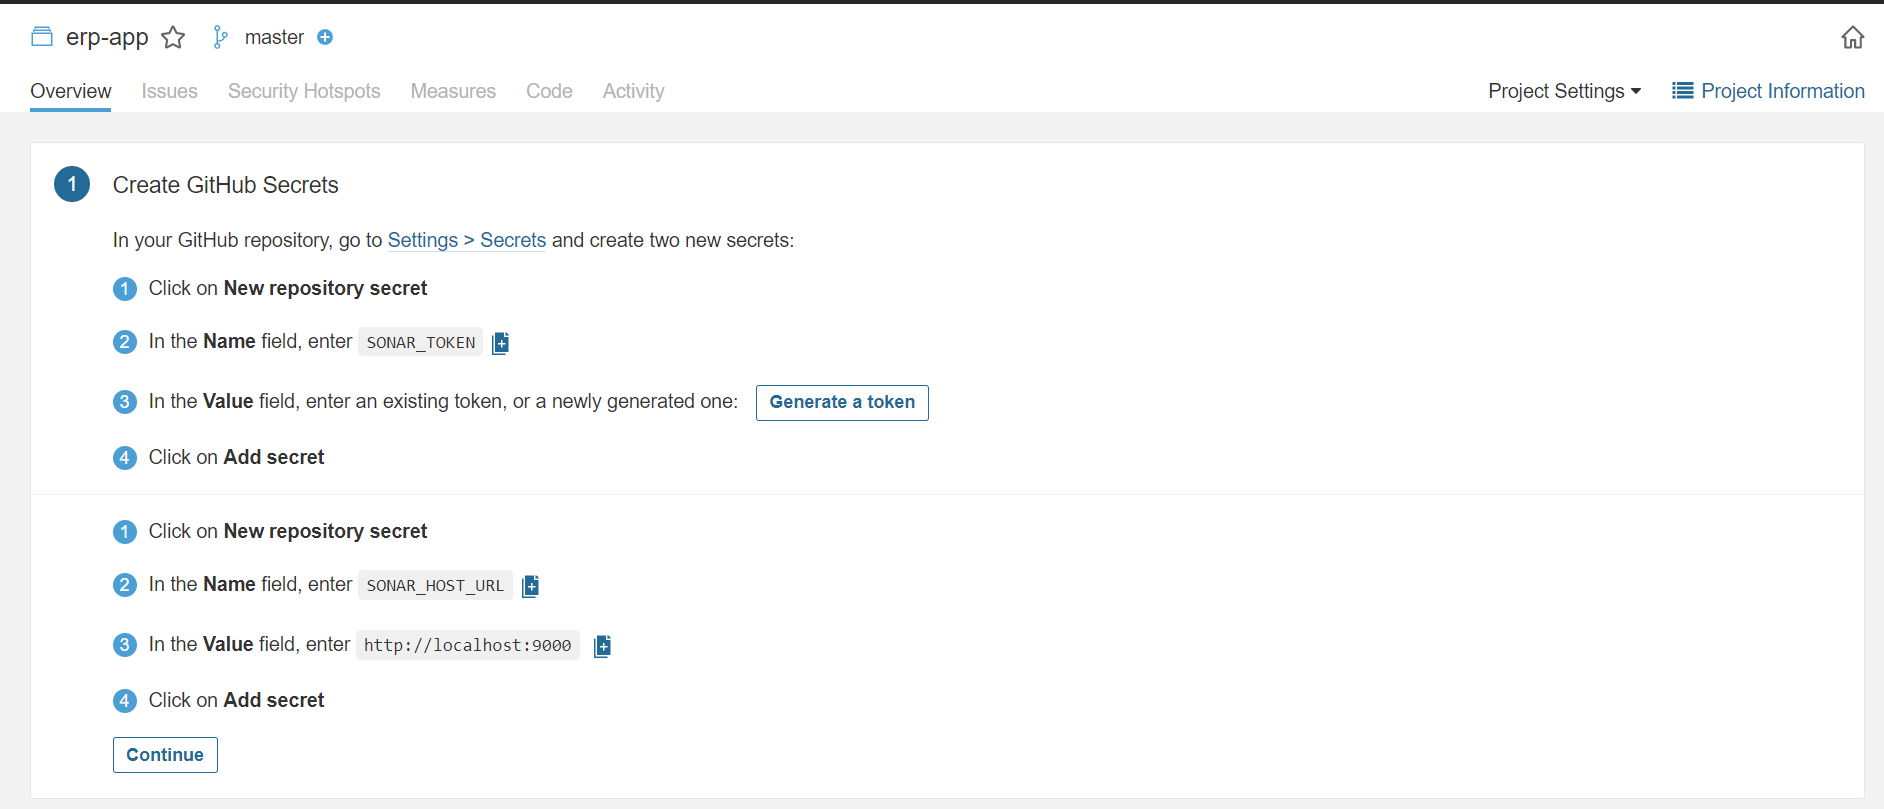
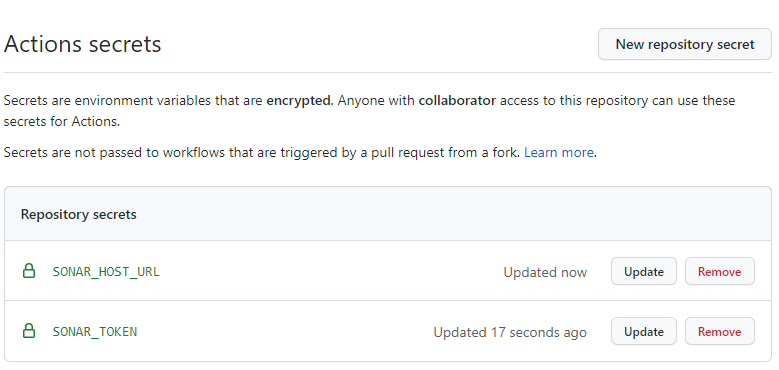
The default credential is always admin/admin (username: admin, password: admin), and you need to reset passwords after the first login. You need to note the address of the SonarQube server, we will use it in the next few steps.
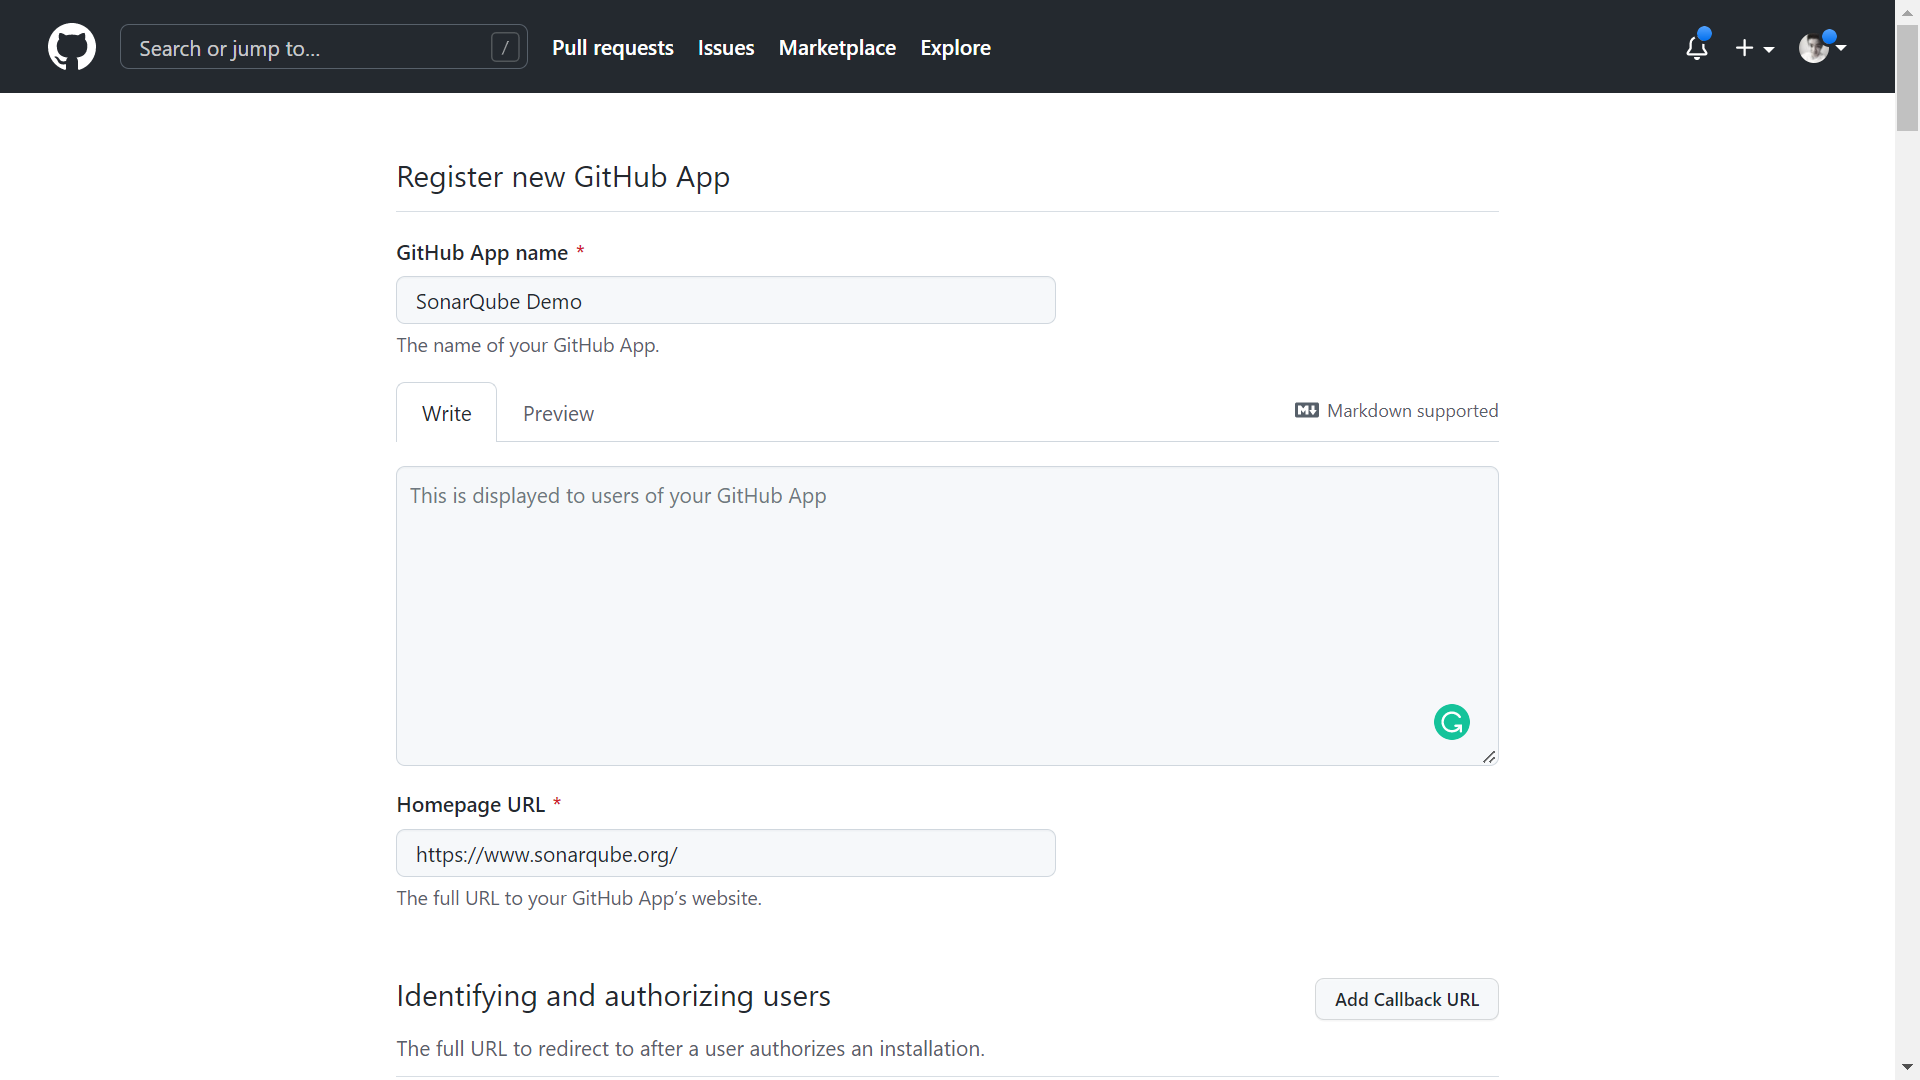
4. Register new GitHub App
Navigate to GitHub at Settings > Developer Settings > GitHub Apps and register a new GitHub App with the below information:
- GitHub App Name – Your app's name.
- Homepage URL – You can use any URL, such as https://www.sonarqube.org/.
- User authorization callback URL – Your SonarQube based URL (Debian VM external IP). For example, http://35.223.179.72
- Webhook URL – Your instance's base URL. For example, http://35.223.179.72.
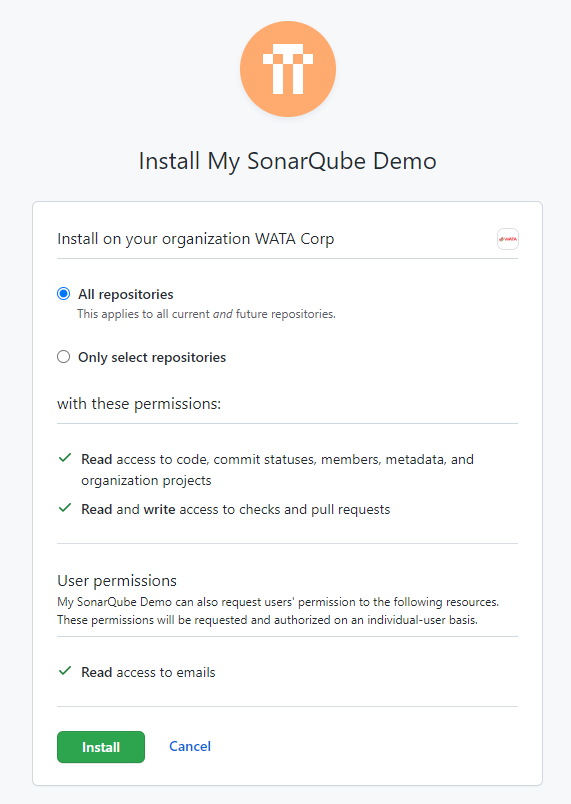
- Grant access for the following Repository permissions:
| Permission | Access |
|---|---|
| Checks | Read & write |
| Metadata | Read-only |
| Pull Requests | Read & write |
| Commit statuses | Read-only |
- For private repositories, grant access to the following Repository permissions:
| Permission | Access |
|---|---|
| Contents | Read-only |
- If setting up GitHub Authentication, in addition to the aforementioned Repository permissions, grant access for the following User permissions:
| Permission | Access |
|---|---|
| Email addresses | Read-only |
- And grant access for the following Organization permissions:
| Permission | Access |
|---|---|
| Members | Read-only |
| Projects | Read-only |
- Under "Where can this GitHub App be installed?," select Any account.
Next, you need to generate a private key to install the GitHub app and save the .pem file locally.

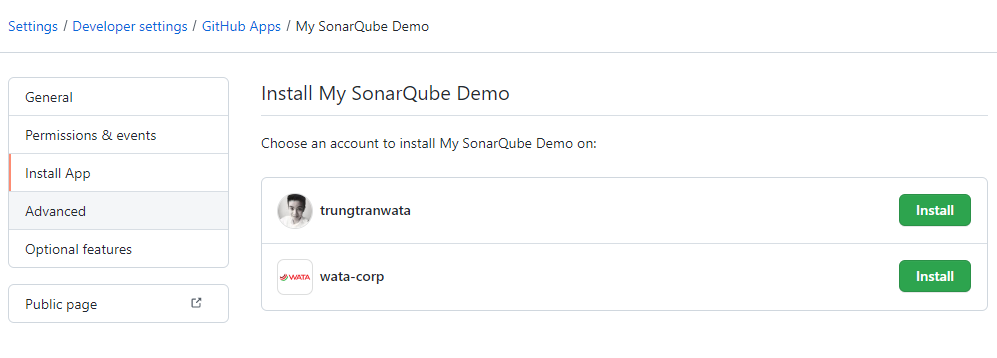
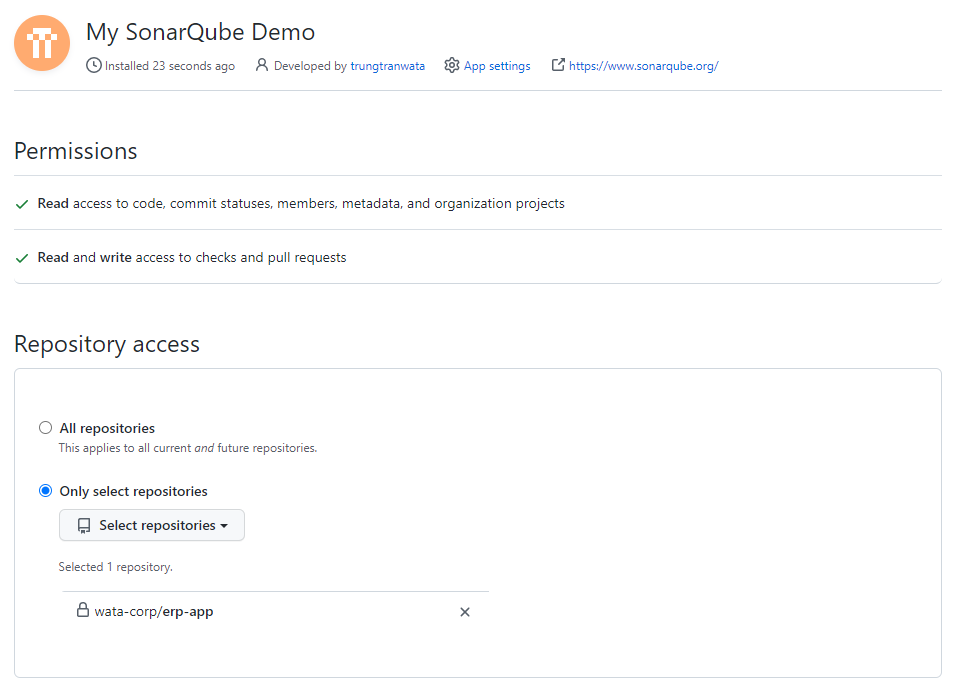
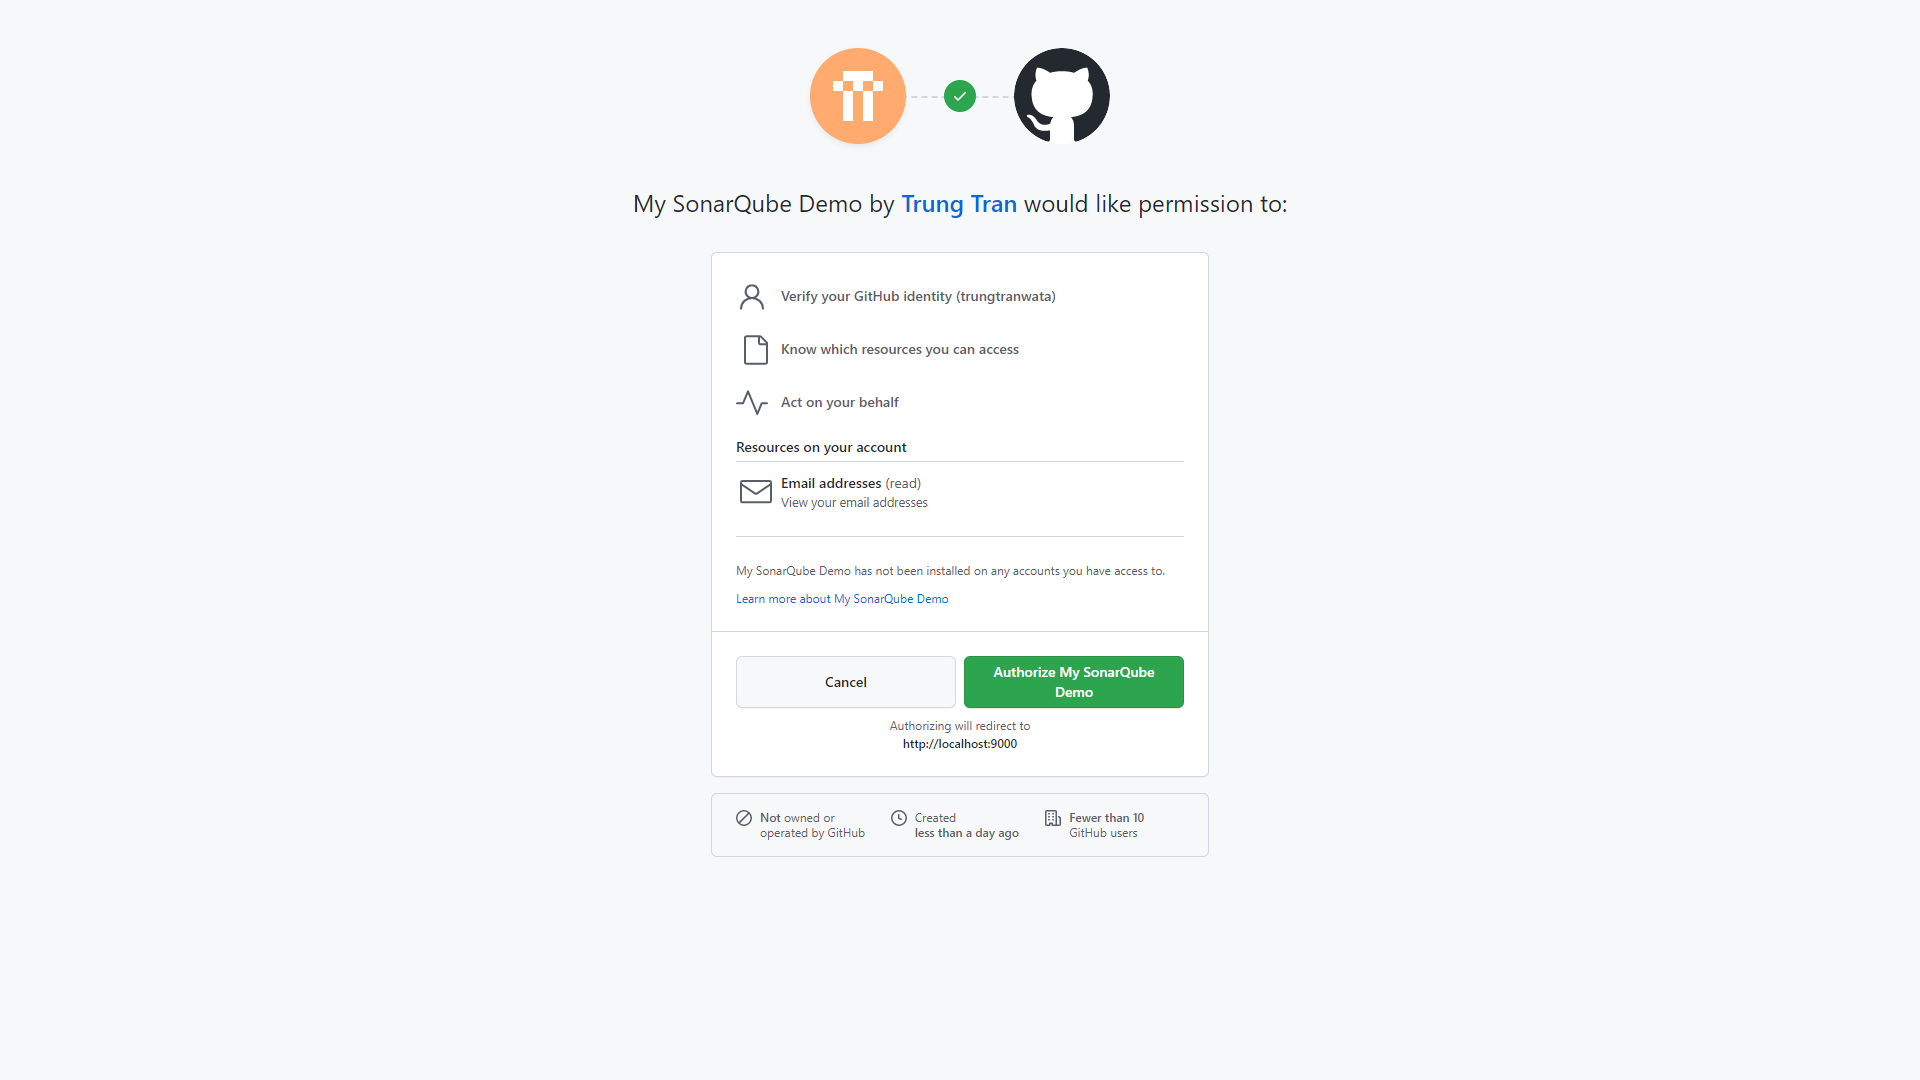
Next, we need to install our app on GitHub account before starting configuring our SonarQube project, it can be either personal or organization.
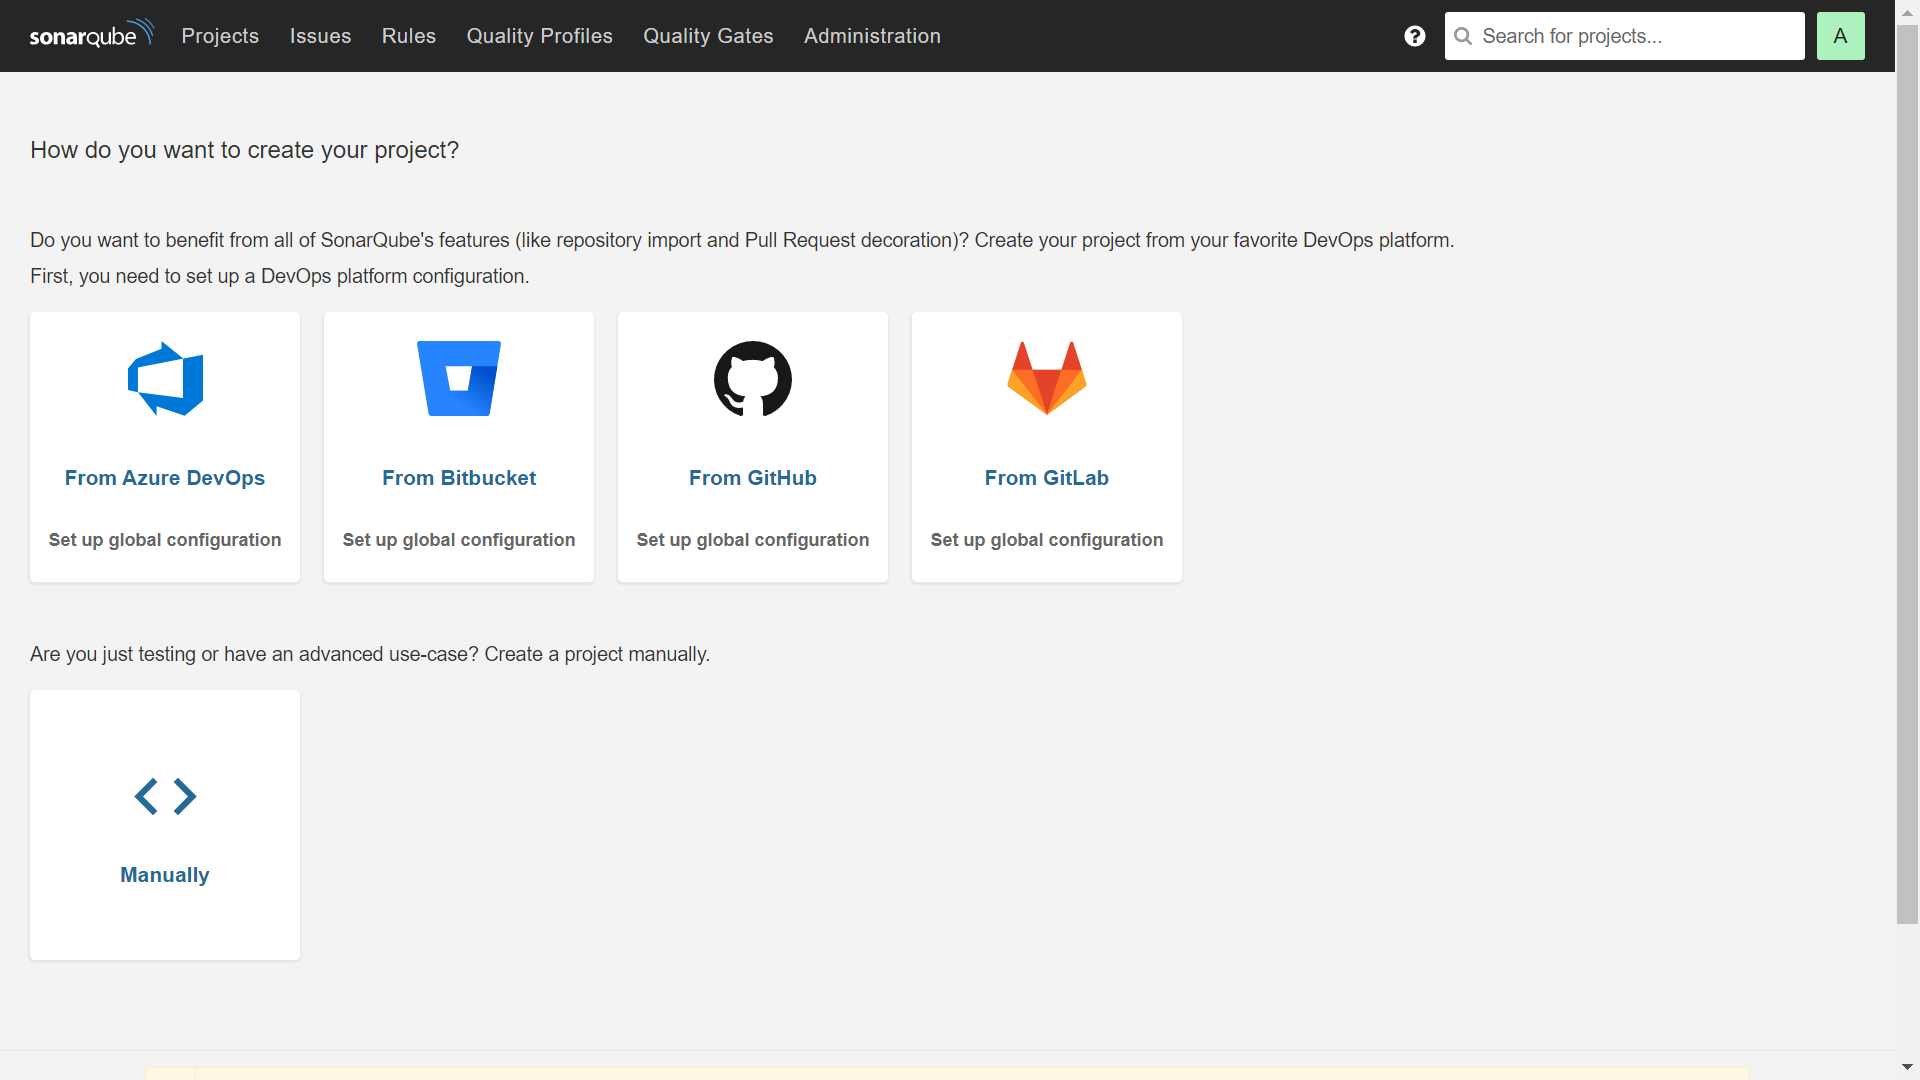
5. Create our first project on SonarQube and start scanning
From the dashboard of the SonarQube page, we will create a new GitHub project to scan our codes from there.
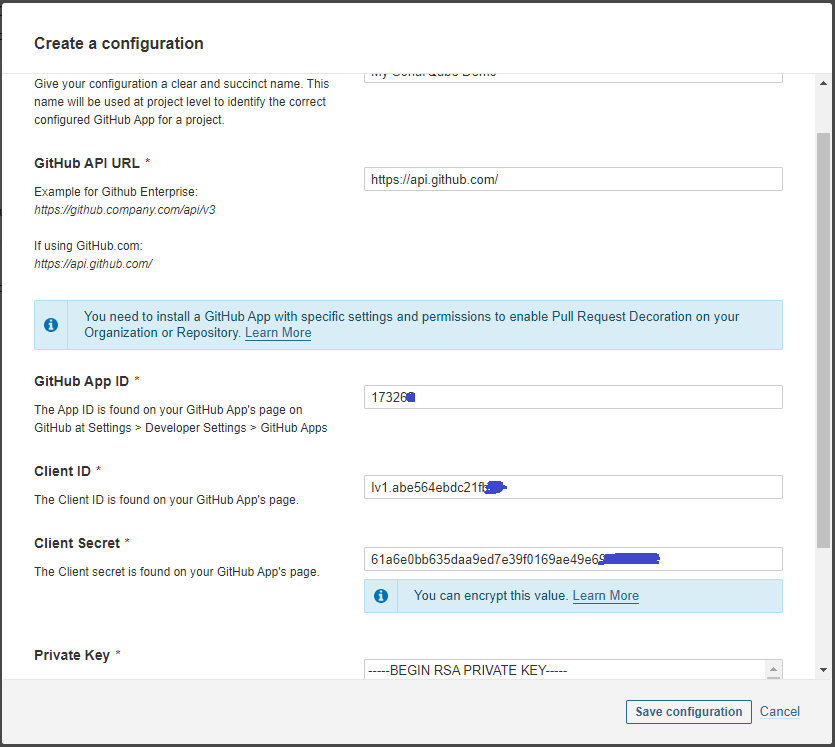
Configuration name: any name, GitHub API URL: https://api.github.com/, GitHub App ID + Client ID + Client Secret + Private Key: get from your GitHub app above.
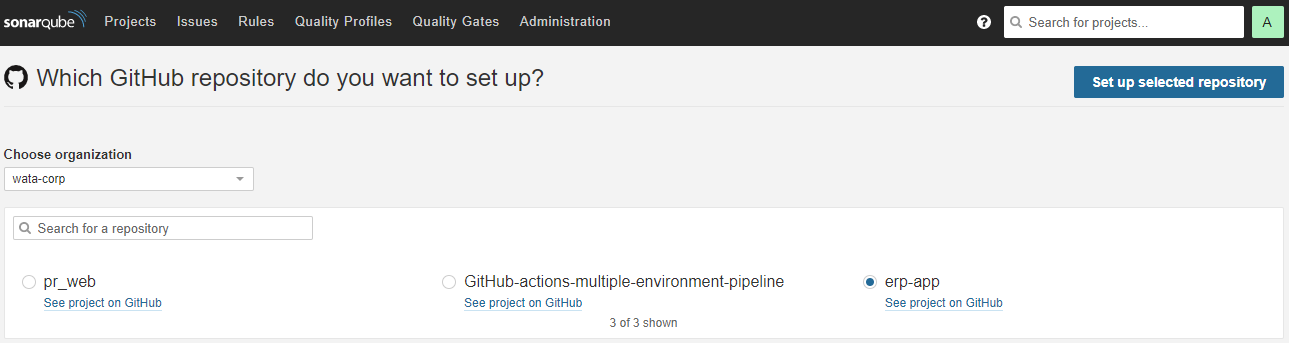
Next, select the organization and the repository that we need SonarQube scan then create Set up the selected repository.


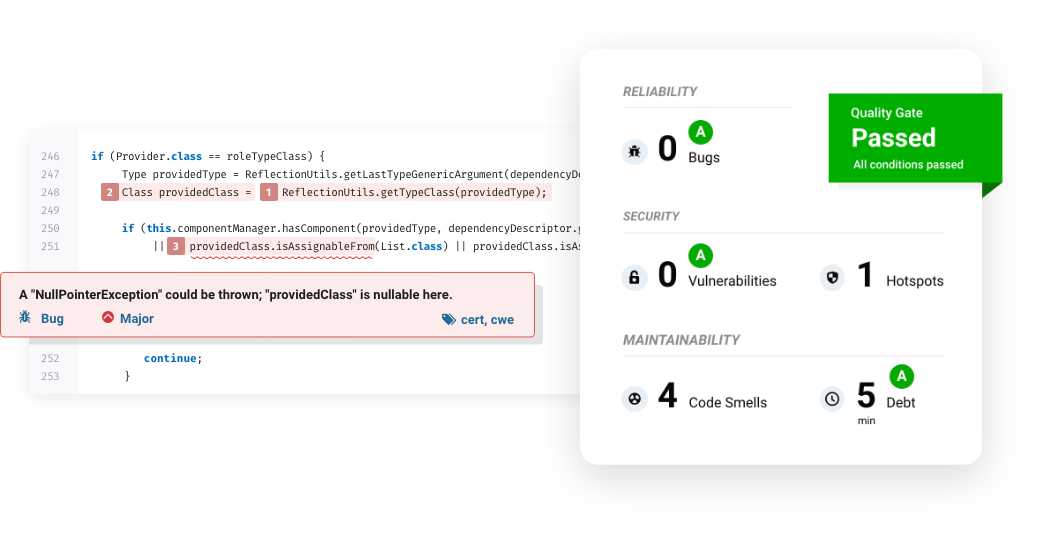
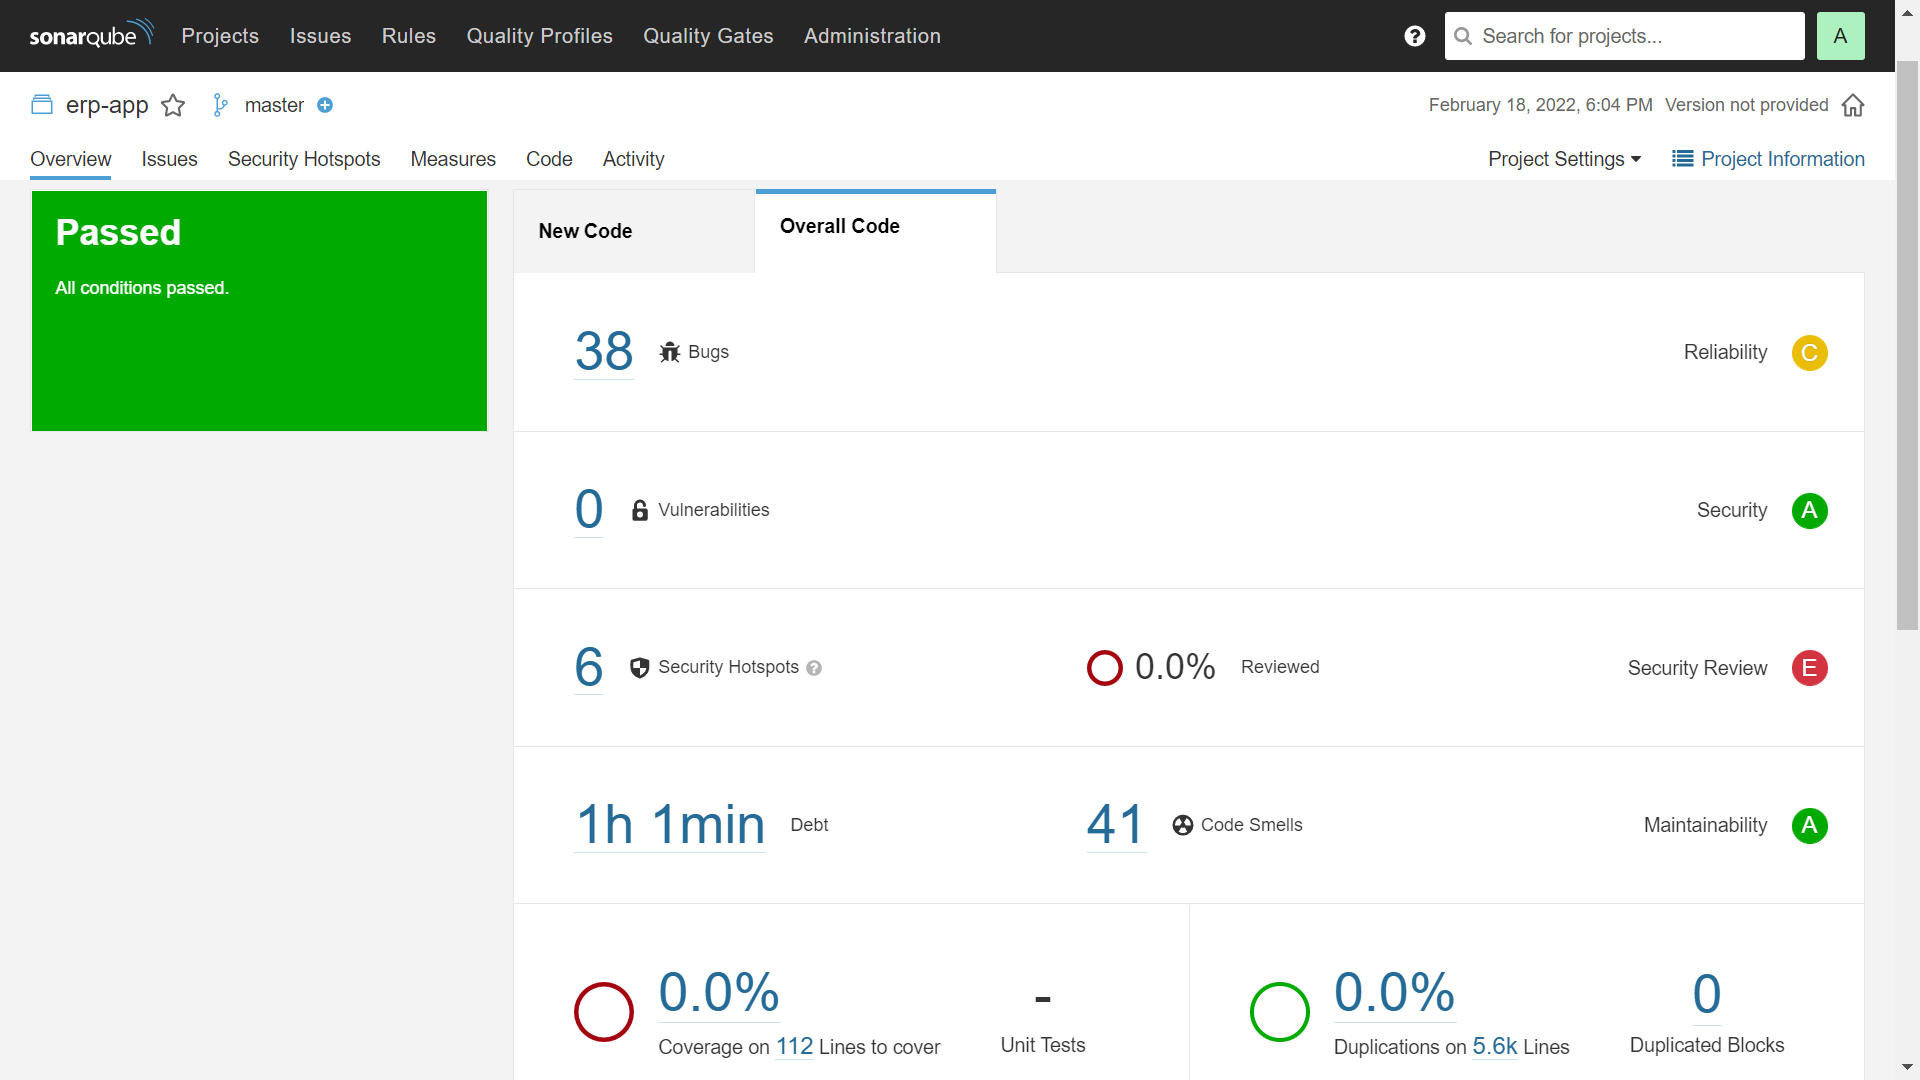
So we're all set after going on a long journey, let's see the results.

After the analysis is finished, we can see the result as below image, check it and start improving your code quality!
If you got an Unauthorized error like below, check your sonar-project.properties and make sure sonar.login, sonar.password are all set! (Not recommended for production environment but fine for the lab/demo purpose)
ERROR: Error during SonarScanner execution
INFO: Final Memory: 4M/20M
ERROR: Not authorized. Please check the properties sonar.login and sonar.password.
Congrats, you successfully provision the resources, build, config and run the code scan with the SonarQube community version. See you in the next post! Don't forget to remove the resource after finish to save your cost.